How to Crochet a Dinosaur: No-Sew Beginner Amigurumi

CrochetEasy44:207 stepsBrowse more →
Also in:Crafts

By ShowMeStepByStepPublished Updated

Based on a video by The Mary Jay.

Amigurumi dinosaurs look complicated but this no-sew pattern from Mary at The Mary Jay builds the whole body in one continuous piece. No assembly, no sewing parts together at the end. The bobble stitches form the legs right in the body rounds, so when you fasten off you've already got a finished plushie ready for safety eyes and a bit of embroidery.

The trick is super bulky #6 chenille yarn with a 6.5 mm hook. Each stitch is the size of a grape, so a full dinosaur works up in an afternoon instead of a week. The chunky yarn also hides any tension wobbles, which makes it forgiving for someone who's only crocheted scarves before.

If you're new to working in the round, you'll meet the magic circle in step 1 (see our magic ring tutorial if you want to slow that down) and the bobble stitch in step 3. Both show up enough times that they click before the body is done. The single crochet stays the same as it would on a flat row - check our single crochet primer if you need a refresher. Once this dinosaur is off the hook, the same no-sew framework also makes a great amigurumi octopus for variety.

The original pattern teaches a dragon. To make it a dinosaur, skip the wings and the back spike row at the end. Everything else - snout, head, four bobble legs, body, eyes, nostrils, blush - stays the same.

Step-by-Step Guide

1

Step 1: Gather Supplies and Work the Magic Circle

1:50
Step 1: Step 1: Gather Supplies and Work the Magic Circle

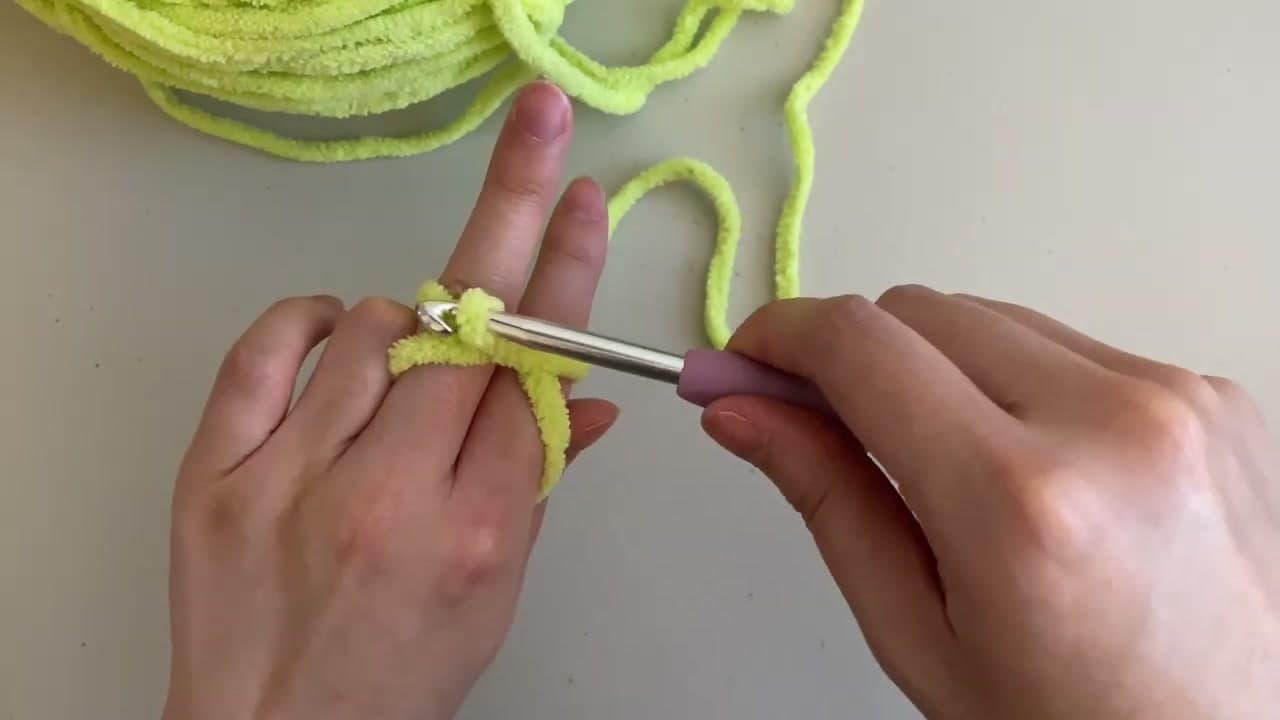
Lay everything out before you start: a 6.5 mm crochet hook, one skein of super bulky #6 chenille yarn in green, small amounts of white and pink yarn, a yarn needle, sharp scissors, polyester fiberfill, two 18 mm safety eyes, and a locking stitch marker.

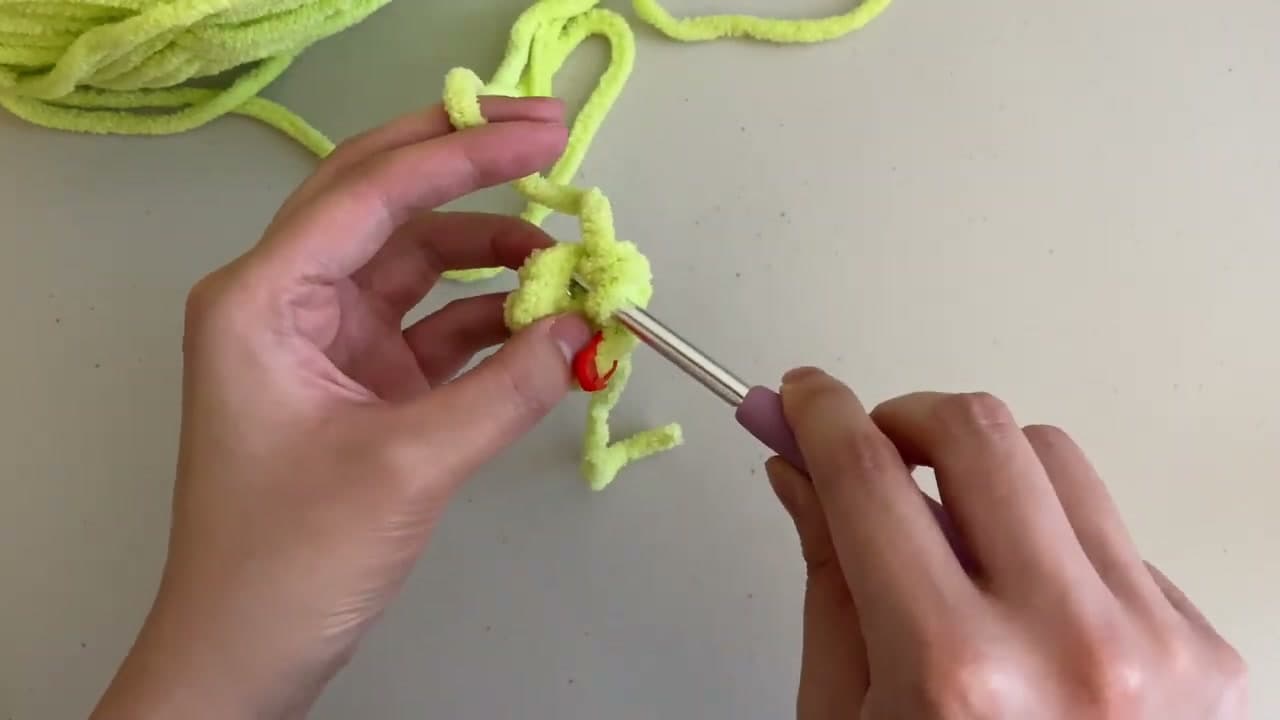
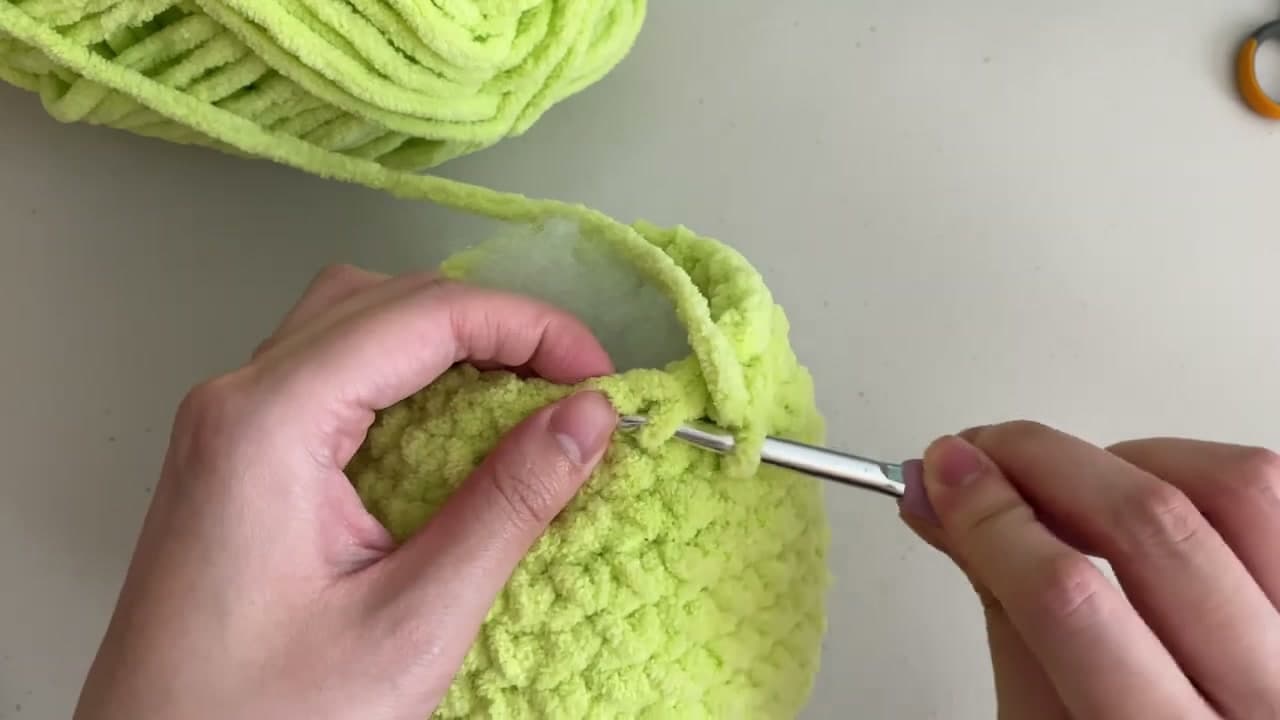
Make a magic circle. Pinch the yarn between thumb and pointer, wrap once around your pointer and middle finger to form an X, slide the hook under the X, grab the lower strand, and pull it through. Rotate the hook over the X, grab the lower strand again, and pull through to lock the loop.

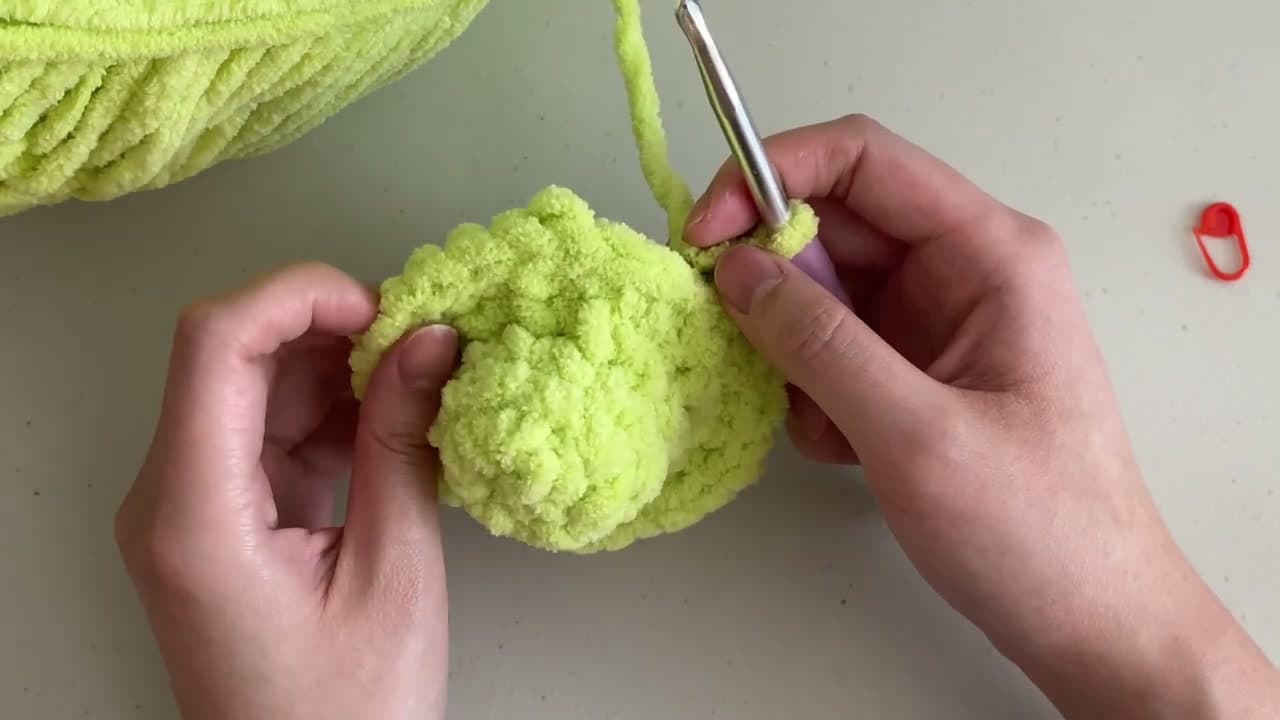
Now work 6 single crochets into the ring. Go under both strands of the loop each time, yarn over, pull through, yarn over, pull through the two loops on the hook. After all six are in, tug the tail to cinch the ring closed. That's round 1 - the tip of the dinosaur's snout.

Tip

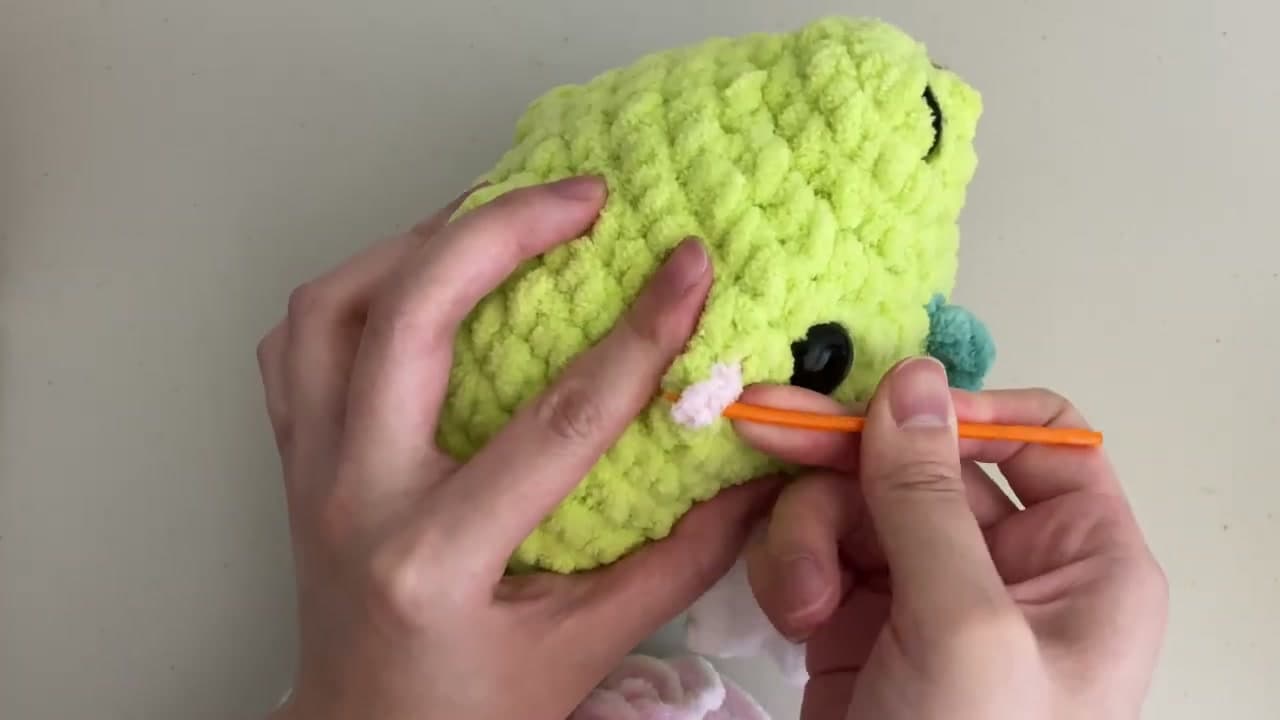
Safety eyes are choking hazards. For a plushie meant for a young child or a pet, swap them for buttons sewn on with strong thread, felt circles, or yarn embroidery. The 18 mm size in the materials list is for display plushies and older kids.

2

Step 2: Build the Snout with Increase and Front-Loop Rounds

3:40
Step 2: Step 2: Build the Snout with Increase and Front-Loop Rounds

Round 2 is a pure increase round. Work 2 single crochets into every stitch around for a total of 12. Drop your stitch marker into the last stitch so you know where each round ends from here on. Move it up at the end of every round.

Rounds 3 and 4 stay flat at 12 stitches each - just one single crochet in every stitch all the way around.

Round 5 is the magic snout round. Work 2 single crochets into the front loop only of every stitch around. Skipping the back loops makes the front loops flare outward like a tiny ruffle, which is what gives the dinosaur its little snout overhang. You'll end round 5 with 24 stitches.

Tip

The front loop is the one closer to you when you look down at your work. If the stitches look like little V shapes, the front loop is the leg of the V on your side of the fabric. Skip the back leg and your hook only goes into the front.

3

Step 3: Shape the Head and Add the Bobble Eye Ridges

9:50
Step 3: Step 3: Shape the Head and Add the Bobble Eye Ridges

Round 6 increases the head to 30 stitches. The pattern is single crochet 3, increase, repeated six times around. Round 7 stays at 30 with a plain single crochet round.

Rounds 8 and 9 add the white bobble eye ridges. In round 8, work 27 single crochets in green, then switch to white yarn for the final yarn-over of the last green stitch. Make a 5-double-crochet bobble in white: yarn over, hook into stitch, pull up a loop, yarn over and pull through 2 loops (one half-finished double crochet); repeat 4 more times in the same stitch until you have 6 loops on the hook, then switch back to green for the final yarn-over and pull through all 6 loops to lock the bobble. Finish the round with 2 more green single crochets.

Round 9 mirrors round 8: 2 single crochets in green, change to white for a second 5-dc bobble, change back to green, and finish with 27 single crochets. The two bobbles sit side by side on top of the head as the eye ridges.

Tip

When you change colors mid-stitch, leave both yarn tails on the inside of the work and tie them together loosely. The knot stays hidden inside once the body is stuffed, and it stops the color change from unraveling later.

4

Step 4: Make the Front Legs with Bobble Feet

18:00
Step 4: Step 4: Make the Front Legs with Bobble Feet

Round 10 keeps the count at 30 stitches but adds two 6-double-crochet bobbles in green to form the front feet. The sequence is 12 single crochets, 6-dc bobble, 4 single crochets, 6-dc bobble, 12 single crochets.

The 6-dc bobble is the same idea as the 5-dc one in step 3, just bigger. Work 6 half-finished double crochets into the same stitch until you have 7 loops on the hook, then yarn over and pull through all 7 in one final motion. Push each bobble outward from the inside as you finish it so the foot pops forward instead of sucking into the body.

The two bobbles sit close together at the front of the dinosaur and read as a pair of stubby feet. Because everything happens within the body round, there's no separate piece to attach later.

Tip

If your first bobble looks lopsided, gently push it from the inside of the body before you move on. Once you crochet the next stitch the bobble locks in place. Now is the time to nudge it into shape.

5

Step 5: Crochet the Body and Add the Back Legs

23:00
Step 5: Step 5: Crochet the Body and Add the Back Legs

Rounds 11 through 14 are four plain single crochet rounds at 30 stitches each. These build the body length between the front and back legs. The body grows taller without getting wider.

Round 15 mirrors round 10 to add the back legs. Work 13 single crochets, a 6-dc bobble, 4 single crochets, another 6-dc bobble, then 11 single crochets to finish the round. The offset shifts the back feet slightly so they sit further down the body than the front ones.

Round 16 is one more plain round of 30 single crochets to settle the shape and lock the back legs in place.

Tip

Stuff a small amount of fiberfill into the snout end of the body now, before the opening gets too narrow to reach into easily. Small handfuls are easier to shape than one big wad.

6

Step 6: Attach the Eyes, Stuff the Body, and Decrease to Close

26:50
Step 6: Step 6: Attach the Eyes, Stuff the Body, and Decrease to Close

Round 17 starts shaping the back end with a decrease pattern: single crochet 3, decrease, repeat six times for 24 stitches. The invisible decrease (going into the front loops only of the next two stitches before yarn-over) keeps the fabric tight without leaving a gap.

Pause here to attach the safety eyes. Pick a spot between rounds 6 and 7, lined up with the white bobble eye ridges, push each eye post through the fabric from the outside, then snap the locking washer onto the post from the inside. Once it clicks, the eye is locked.

Add more fiberfill in small handfuls. Round 18 decreases to 20 stitches (3 decreases, 16 single crochets, 1 decrease). Round 19 decreases to 18 (2 decreases, 16 single crochets). Round 20 is 9 decreases for 9 stitches. Round 21 is 1 single crochet, decrease, repeated three times for 6 stitches. The final round is 3 decreases for 3 stitches. Stuff firmly as the opening shrinks. Fasten off and use the long tail with a yarn needle to weave through the remaining 3 stitches and pull tight to close the hole.

Tip

An under-stuffed amigurumi looks deflated and a saggy dinosaur reads as sad. Pack the stuffing more firmly than feels natural - the chenille yarn compresses around it once you close the body, and it will plump out again.

7

Step 7: Embroider Nostrils and Rosy Cheeks

71:32
Step 7: Step 7: Embroider Nostrils and Rosy Cheeks

Cut a length of black #4 worsted-weight yarn and thread it through your yarn needle. Insert the needle from behind round 2 of the snout, exit at the front of round 2 (a small vertical line about one stitch tall), then loop the yarn around once more to make the line look solid. Repeat on the other side of the snout. Tie the ends inside the body and trim.

For rosy cheeks, cut a short piece of pink yarn and thread it through the yarn needle. Sew a small horizontal stitch one stitch below the outer corner of each safety eye, then knot the ends inside the body. If the cheek pulls in too tight, use the needle to fluff the yarn back out into a visible patch of pink.

Skip the dragon wings and back spikes from the original pattern - your dinosaur is done. Name it something good and pose it for a photo. Perfect for a young dinosaur enthusiast or a desk companion.

Tip

Worsted weight is thinner than the chenille body yarn, which makes the nostrils look like clean little lines instead of fuzzy lumps. If you only have super bulky yarn, separate it into thinner plies before threading the needle.

Products Used

☐ The Checklist

How to Crochet a Dinosaur: No-Sew Beginner Amigurumi

Tools
5
Materials
6
Steps
7
Video
44 min

Your Guide

The Mary Jay

As an Amazon Associate we earn from qualifying purchases. Links on this page may be affiliate links - clicking them and buying doesn't change your price, but helps support ShowMeStepByStep.

Tags

What's next

Weekly Digest

Liked this crochet tutorial?

Pick the categories you want to hear about. Weekly digest of new step-by-step tutorials. No spam, easy unsubscribe.

Send me tutorials about

We only email about new tutorials. Easy unsubscribe anytime.