How to Seal Concrete Crafts (Indoor and Outdoor Sealers)

CraftsEasy6:457 stepsBrowse more →

By ShowMeStepByStepPublished

Based on a video by Calafia Candle Co..

Raw concrete is porous. Leave it bare and it soaks up water, oil, and stains, and a planter or candle jar can weep moisture onto whatever it sits on. A sealer closes those pores so your piece stays clean, stands up to daily use, and keeps its color. In this walkthrough, Bree from Calafia Candle Co. shows how she seals her concrete candle vessels with a food-safe, water-based sealer and a plain foam brush.

The sealer you reach for depends on where the piece will live. For indoor decor like trinket dishes, coasters, and vases, a water-based acrylic sealer is easy to use, low-odor, and dries fast. Anything that holds a flame, food, or water wants a food-safe sealer instead. And for a piece heading outside into the weather, a penetrating outdoor sealer soaks in and shrugs off rain and frost. Bree keeps the outside of her jars matte and only seals the interior, which is a good reminder that the finish is your call.

Sealing is the last step in a longer make, so it helps to have the earlier stages down. If you are still dialing in your pours, start with how to mix concrete for crafts, then put it to work on a concrete planter or a concrete vase. A concrete soap dish is a good one to seal well, since it lives around water every day.

Step-by-Step Guide

7 steps · about 7 minutes.Check off each step as you go and your progress saves automatically.

1

Step 1: Cure and Clean the Piece First

4:10
Step 1: Step 1: Cure and Clean the Piece First

Before any sealer touches your concrete, make sure the piece is fully cured. Fresh concrete looks dry on the surface long before it has hardened all the way through, so give it at least 24 to 48 hours, and longer for thicker pieces. Seal too early and you trap moisture inside, so the coat will not bond.

Once it is cured, wipe it down. Run a dry cloth or a soft brush over the surface to clear off dust and loose grit. Any powder left behind gets locked under the sealer and shows up as a rough patch, so a quick clean now pays off later.

Tip

Watch this step If the concrete still feels cool or damp to the touch, it needs more time. A fully cured piece feels dry and sits at room temperature.

2

Step 2: Choose Your Sealer, Indoor or Outdoor

3:48
Step 2: Step 2: Choose Your Sealer, Indoor or Outdoor

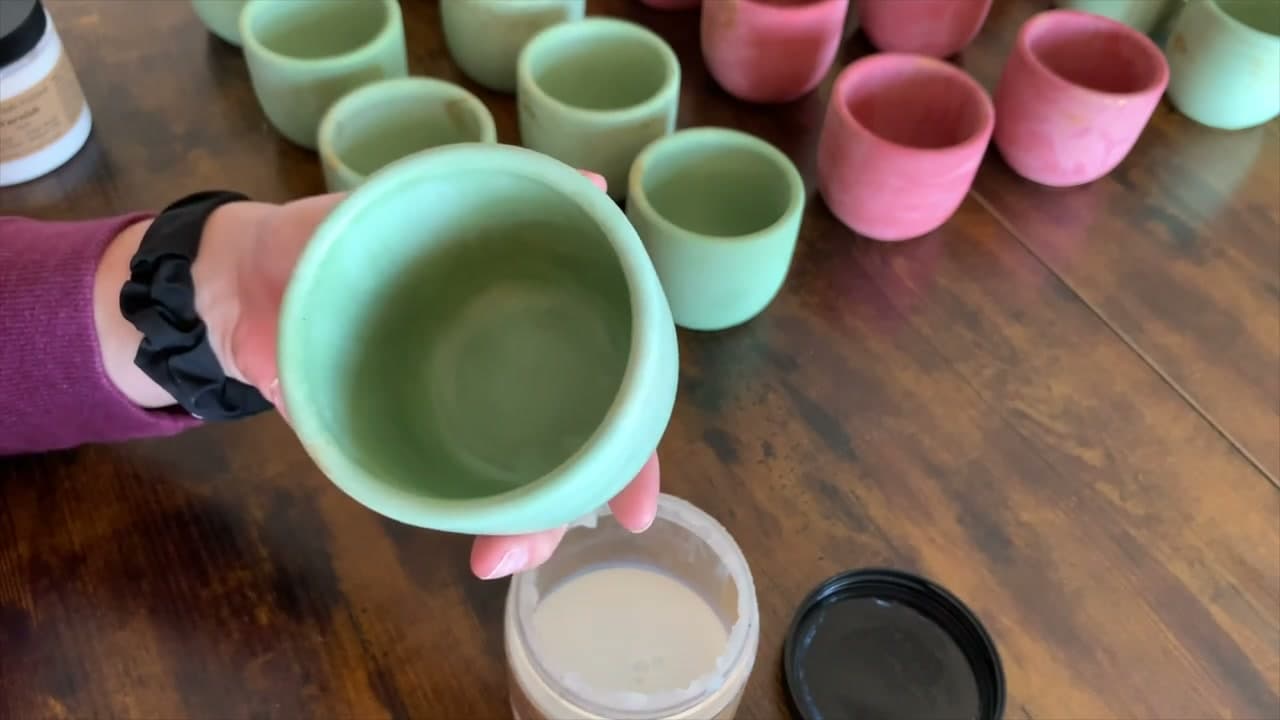
This is the decision that matters most. For indoor pieces, a water-based acrylic sealer is the friendly pick: low odor, quick drying, and it wipes on clean. If the piece will hold a candle, food, or water, step up to a food-safe sealer rated for that use. Bree uses a non-toxic, water-based sealer on her candle jars for exactly that reason.

For anything living outdoors, reach for a penetrating outdoor sealer. It sinks into the concrete instead of sitting on top, so it handles sun, rain, and freeze-thaw without peeling. Match the sealer to the job and the finish holds up.

Tip

Watch this step Want a matte look on the outside? A matte varnish keeps that raw concrete feel while still adding protection. Satin and gloss are there if you want more shine.

3

Step 3: Load Your Foam Brush

4:32
Step 3: Step 3: Load Your Foam Brush

A foam brush is the tool for this. It lays sealer down smooth with no bristle marks, and it costs little enough to toss when you are done. Dip it into the sealer and coat both flat sides evenly.

A little goes a long way, so press the brush against the rim of the jar to squeeze off the extra. You want the foam damp, not dripping. Too much sealer at once pools in corners and dries cloudy, so build it up in thin passes instead.

Tip

Watch this step Keep a second foam brush within reach. If the first one starts to crumble or stiffen up, swap it out rather than fighting a falling-apart tip.

4

Step 4: Brush On the First Coat

4:48
Step 4: Step 4: Brush On the First Coat

Start your first coat in straight vertical strokes and work your way around the whole piece. On the inside of a vessel, run the brush from the base up to the rim, turning the piece as you go so you cover every section.

Here is the handy part: the sealer darkens the concrete a little where it lands. That wet line shows you exactly what you have covered and what you still need to reach, so you are far less likely to miss a spot. Keep the coat thin and even.

Tip

Watch this step Work over a sheet of scrap paper. Drips wipe off a cured surface easily, but there is no reason to make extra cleanup for yourself.

5

Step 5: Add a Second Coat in the Other Direction

5:40
Step 5: Step 5: Add a Second Coat in the Other Direction

Let the first coat dry. Bree finds hers is ready in about half an hour to an hour, though a thick coat or a humid day takes longer. When it no longer looks or feels tacky, go back in with a second coat.

Run this one in horizontal strokes, crossing the direction you used the first time. That cross-hatch catches any thin spots and evens out the coverage. Two coats is the standard for most pieces. Add a third if you want extra protection on something that will get heavy use.

Tip

Watch this step Do not rush the dry time between coats. A second coat over a tacky first coat lifts and streaks instead of building up cleanly.

6

Step 6: Seal the Bottom and Base Edge

5:45
Step 6: Step 6: Seal the Bottom and Base Edge

The bottom is the part people forget, and it is the part that sits on your furniture. Load a little sealer on the corner of the brush and swirl it across the base until the whole underside is coated. Get the bottom edge where the wall meets the base while you are there.

Sealing here does two jobs. It stops raw concrete from scratching or leaving gray marks on a table, and it blocks moisture from wicking up through the base. A sealed bottom is what makes a piece safe to set down anywhere.

Tip

Watch this step Set the piece on a few painters pyramids to dry so the fresh sealer on the base does not stick to your work surface.

7

Step 7: Cure, Then Finish and Care for It

6:00
Step 7: Step 7: Cure, Then Finish and Care for It

Give the sealed piece a full 24 hours to cure before you use it or add anything to it. Bree waits at least that long before pouring wax into her jars, and the same patience pays off for a planter or a dish. Rushing it now undoes the work you just did.

Once it is cured you can leave the finish as is, or buff on a thin coat of clear wax for a soft sheen and a little extra water resistance. To keep a sealed piece looking good, wipe it with a damp cloth and skip harsh scrubbers, which wear the sealer down over time.

Tip

Watch this step Reseal every year or two on pieces that get daily use or live outside. A quick single coat brings the protection right back.

Products Used

☐ The Checklist

How to Seal Concrete Crafts (Indoor and Outdoor Sealers)

Tools
4
Materials
5
Steps
7
Video
7 min

Tools we recommend

Your Guide

Calafia Candle Co.

As an Amazon Associate we earn from qualifying purchases. Links on this page may be affiliate links - clicking them and buying doesn't change your price, but helps support ShowMeStepByStep.

Tags

Sunday How-To

New crafts tutorials, every Sunday

One short email with the week's best step-by-step guides. Free, no spam, unsubscribe anytime.

Did this work for you?

What's next

Related collections

Curated theme pages that include this tutorial.

Weekly Digest

Liked this crafts tutorial?

Pick the categories you want to hear about. Weekly digest of new step-by-step tutorials. No spam, easy unsubscribe.

Send me tutorials about

We only email about new tutorials. Easy unsubscribe anytime.