How to Make a Father's Day Tie Shaker Card

Card MakingMedium6:4010 stepsBrowse more →

By ShowMeStepByStepPublished

Based on a video by RibbonPaperScissor.

A shaker card adds movement to a handmade greeting - bits of glitter, beads, or sequins shift around behind a clear window every time you tilt the card. Pair it with a tie shape and you have a Father's Day card that already feels personal before Dad even reads it.

This walkthrough from RibbonPaperScissor builds the shaker tie from scratch: a tie window cut from brown cardstock, an acetate backing, foam-tape walls, and a fill of silver beads. The finished card layers a green shirt collar, a striped pattern-paper base, and a BEST DAD ever sentiment with a tiny blue pocket detail. Plan on about 90 minutes start to finish.

Step-by-Step Guide

1

Step 1: Gather Your Materials

0:15
Step 1: Step 1: Gather Your Materials

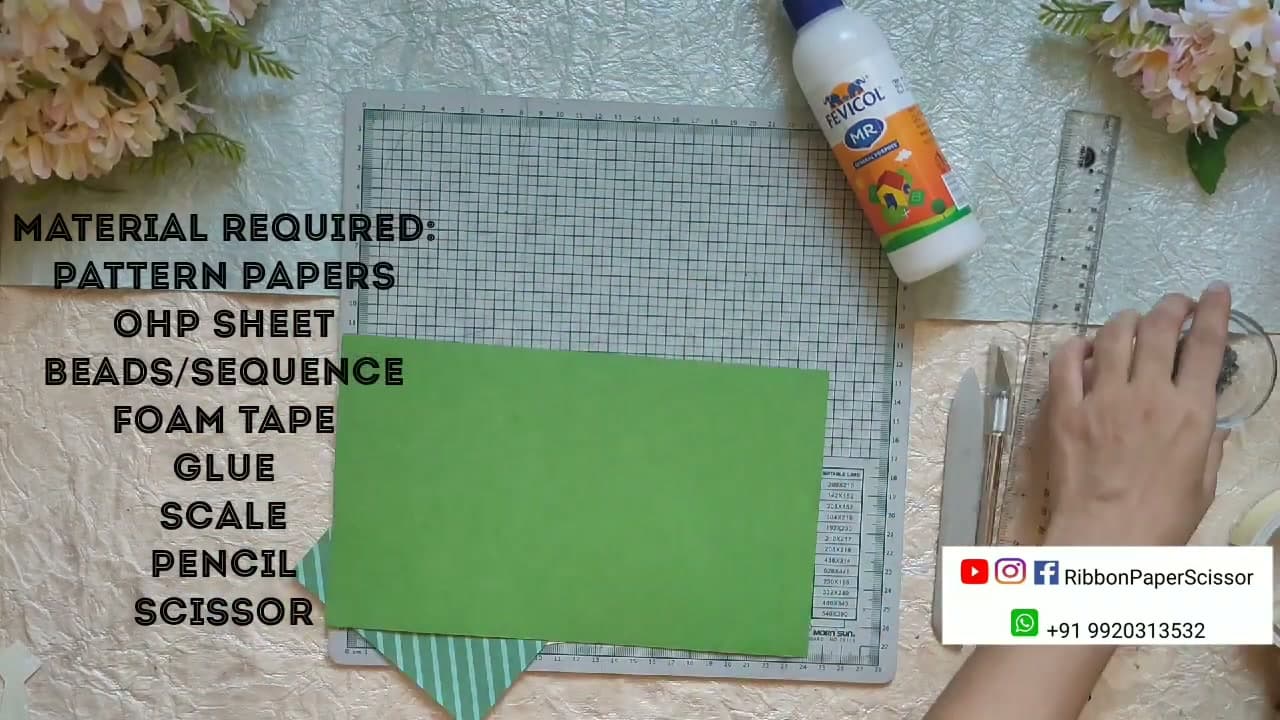
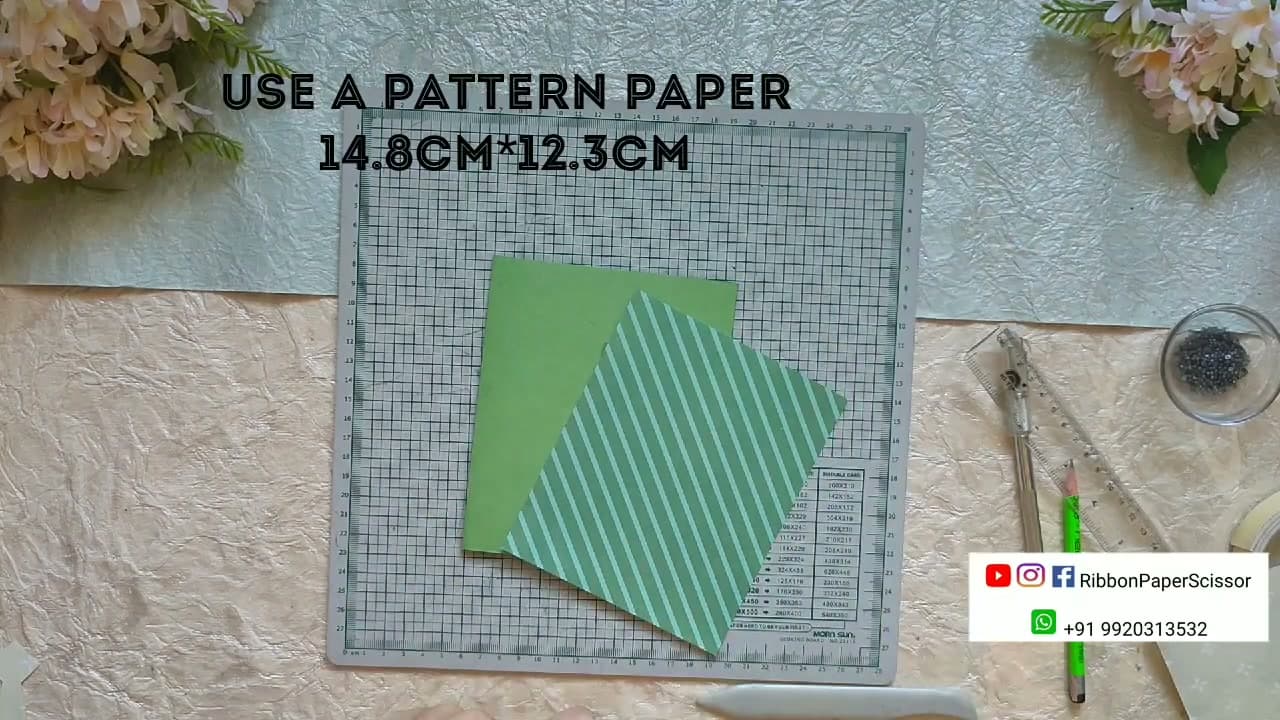
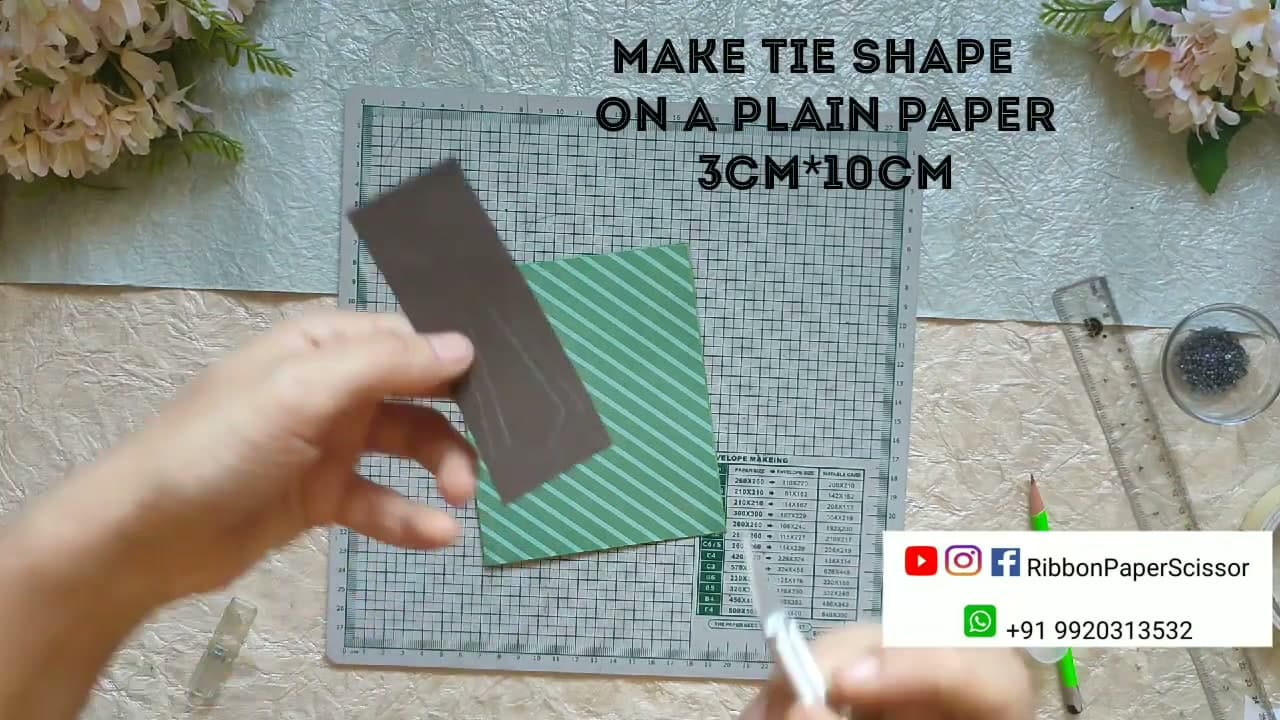
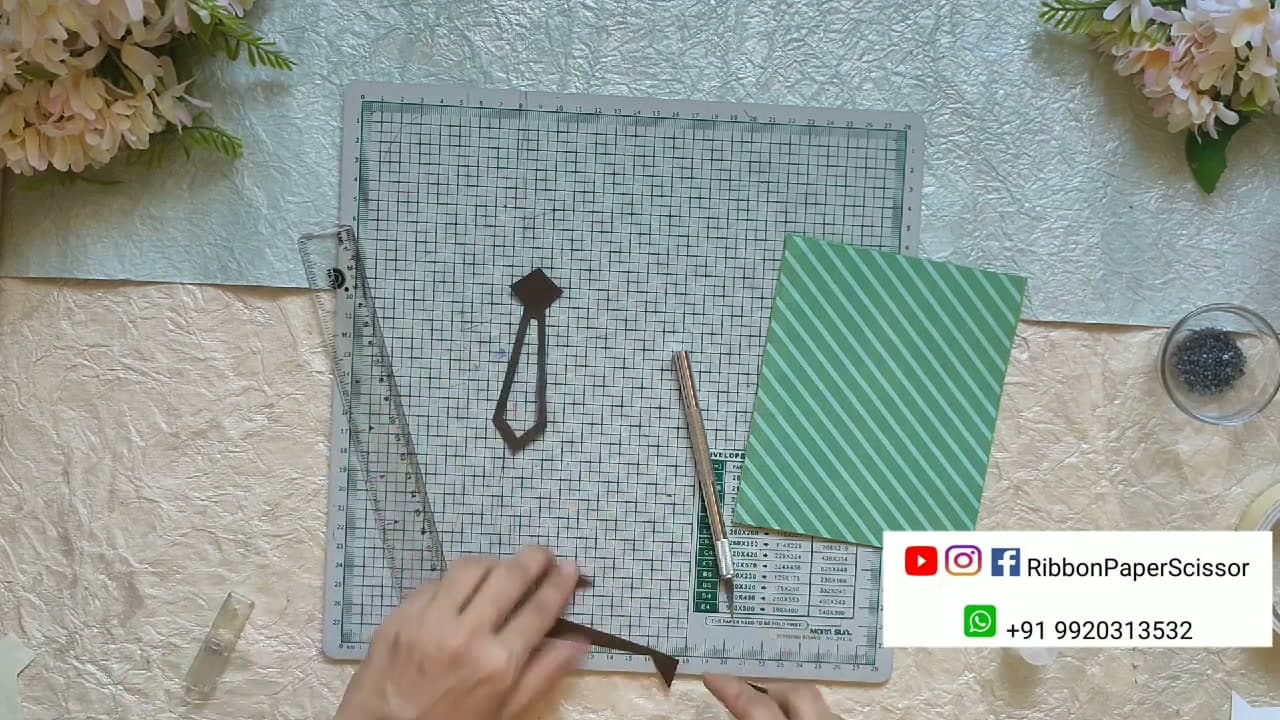
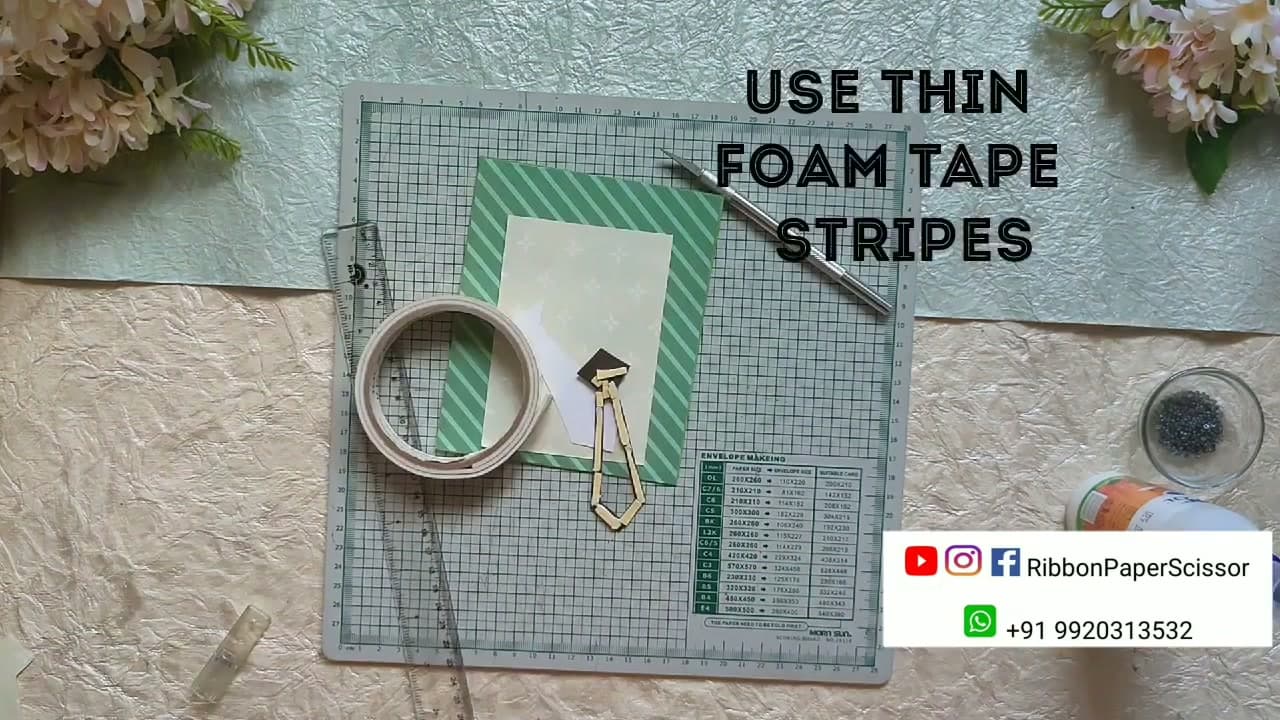
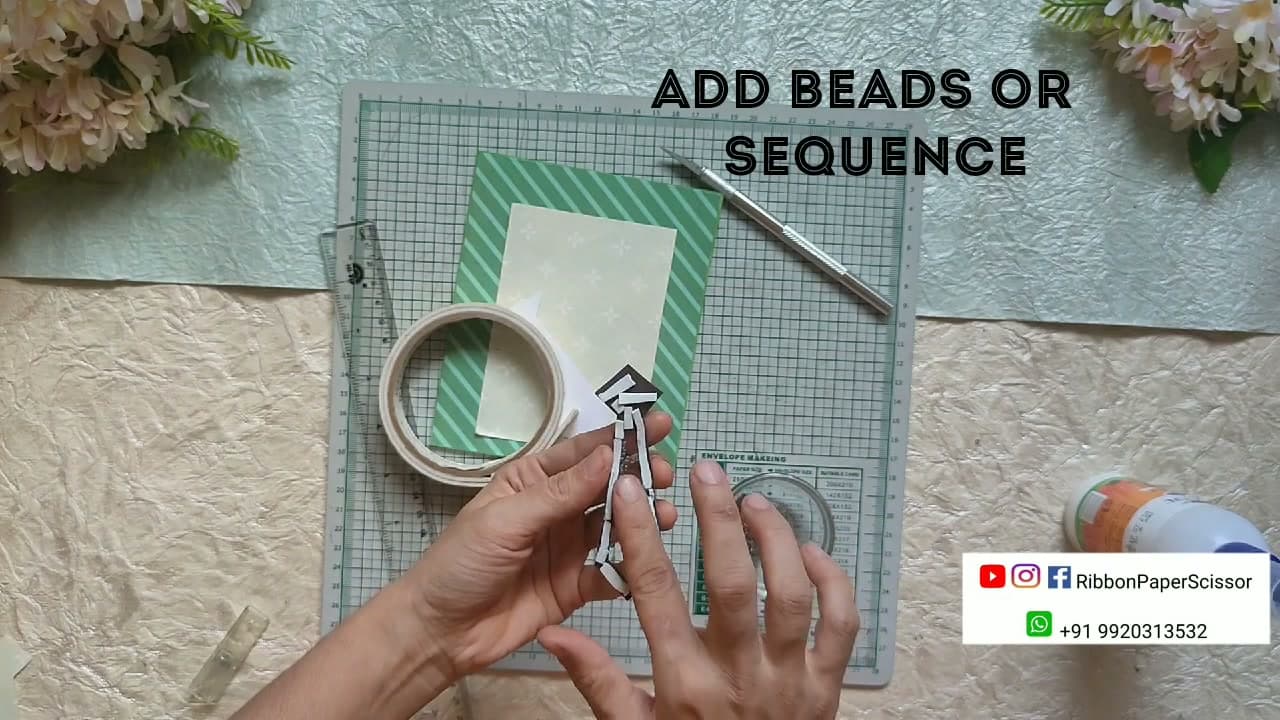
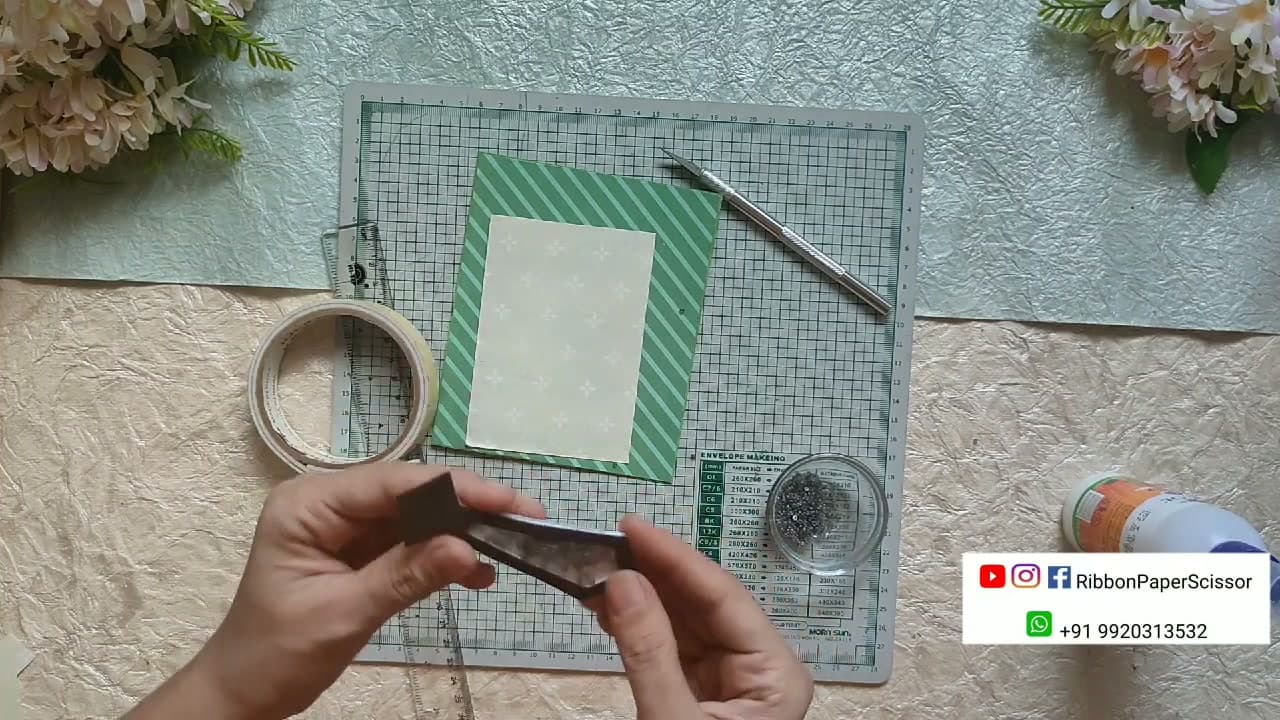
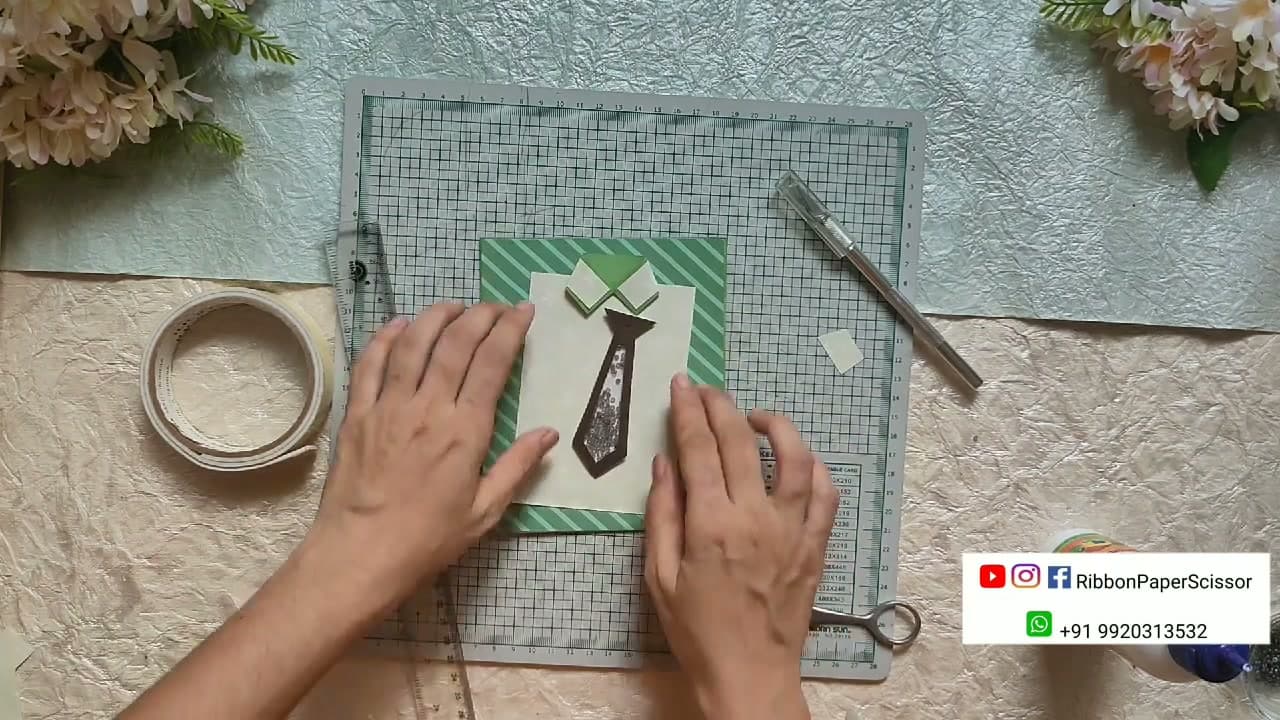
Pull out everything before you start: pattern papers in your color scheme (green stripes for the shirt look great with brown), an OHP sheet (overhead projector acetate) for the shaker window, foam tape, white craft glue, scissors, a pencil, and a ruler. You'll also need silver beads or sequins for the shaker fill - about a teaspoon is plenty for one tie.

Brown cardstock is the key piece - it gives the tie its silhouette. If you don't have brown, navy or dark gray works too. The acetate sheet is what most crafters forget - check the office-supplies aisle for OHP sheets or use a clear plastic sleeve.

Tip

Lay everything out before cutting. Shaker cards have small fiddly pieces and stopping mid-build to hunt for foam tape kills the momentum.

2

Step 2: Cut the Card Base Panel

0:32
Step 2: Step 2: Cut the Card Base Panel

Cut a panel of pattern paper to 14.8 cm by 12.3 cm. The video uses a green diagonal stripe with a cream micro-print as a second layer. The cream panel sits on top of the stripe, slightly smaller, so a thin stripe of green borders the cream.

If you're using A4 cardstock for the actual card base, this panel will get glued to the front of a folded card later. Keep the cuts square - a craft knife and ruler give you cleaner edges than scissors at this size.

3

Step 3: Draw the Tie Template

0:50
Step 3: Step 3: Draw the Tie Template

On a small piece of plain paper or scrap card, draw a tie shape about 3 cm wide by 10 cm long. The shape is a small downward triangle on top (the knot), then a longer trapezoid that widens slightly before tapering to a point.

Don't overthink the proportions. A skinnier tie reads as modern; a wider tie reads as classic. Cut the template out cleanly - this is what you'll trace twice onto brown cardstock to make the shaker.

4

Step 4: Cut the Tie Frame from Brown Cardstock

1:30
Step 4: Step 4: Cut the Tie Frame from Brown Cardstock

Trace the template onto brown cardstock twice. Cut both tie shapes out. On one of them, use a craft knife to hollow out the center - leave a 3 to 4 mm border all the way around. That hollowed piece is the shaker window frame; the solid piece is the back.

Cutting the inner window is the fiddly part. Score the border lightly with the knife first, then cut on the score line. A sharp blade matters - a dull one will tear the cardstock at the knot's narrow point.

5

Step 5: Adhere the Acetate Window

2:00
Step 5: Step 5: Adhere the Acetate Window

Cut a piece of acetate slightly larger than the hollowed tie window. Run a thin bead of glue around the back edge of the tie frame and press the acetate down over the cut area. The clear sheet covers the opening - this is the window that lets you see the beads inside the shaker.

Press around the entire border to seal. Wait 30 seconds for the glue to grab before flipping the piece over to check the front looks clean.

6

Step 6: Build the Foam Tape Walls

2:10
Step 6: Step 6: Build the Foam Tape Walls

Cut thin strips of foam tape and lay them along the back edge of the tie frame, right on top of where the acetate seals to the cardstock. Build the strips into a continuous wall around the entire inner window. The foam tape thickness is what creates the depth that lets the beads shake around.

The wall has to be continuous - any gap and the beads will escape. Take an extra minute to butt the foam tape ends together cleanly at corners.

Products used in this step

7

Step 7: Fill the Shaker with Beads

2:30
Step 7: Step 7: Fill the Shaker with Beads

With the foam tape walls in place, sprinkle silver beads or sequins into the well. Use about a teaspoon - half-full is the sweet spot. Too few and the shaker looks empty; too many and the beads can't move freely.

Mix in some flat sequins with the round beads if you have them. The mix of shapes catches light differently when the card moves, which is the whole point of a shaker.

8

Step 8: Seal with the Base Tie

2:50
Step 8: Step 8: Seal with the Base Tie

Peel the backing off the foam tape walls. Carefully position the second (solid) brown tie shape over the foam tape and press down firmly around the entire perimeter. The two tie shapes sandwich the foam walls and beads in between.

Test the seal by gently tilting the shaker side to side. The beads should slide around inside but nothing should leak. If beads escape, lift, add an extra strip of foam tape over the gap, and re-seal.

9

Step 9: Add the Collar and Mount the Shaker Tie

4:05
Step 9: Step 9: Add the Collar and Mount the Shaker Tie

Cut two small triangles from green pattern paper for the shirt collar - they sit at the top of the cream panel, points down, like collar flaps framing the knot of the tie. Glue them in place.

Run glue (or foam tape, for extra dimension) on the back of the shaker tie and press it onto the cream panel below the collar. Center it so the tie hangs straight down from the collar's V. This is the moment the card stops looking like paper and starts looking like a shirt.

Products used in this step

10

Step 10: Add the Sentiment and Finishing Touches

6:20
Step 10: Step 10: Add the Sentiment and Finishing Touches

Stamp or stick a BEST DAD ever! sentiment in the top-left corner of the panel. Add a tiny blue heart sticker as a chest pocket detail, just below the collar on the right side - use foam tape underneath so it pops off the surface for a 3D effect. A small pearl embellishment between the collar points reads as a tie clip.

Glue the finished panel onto a folded card base. The card is done - shake it gently to hear the beads move.

Tip

Keep a few extra brown tie pairs cut and ready. The next time you need a quick Father's Day, birthday, or 'thinking of you, Dad' card, the shaker tie comes together in 20 minutes instead of 90.

Products Used

☐ The Checklist

How to Make a Father's Day Tie Shaker Card

Tools
6
Materials
10
Steps
10
Video
7 min

Your Guide

RibbonPaperScissor

As an Amazon Associate we earn from qualifying purchases. Links on this page may be affiliate links - clicking them and buying doesn't change your price, but helps support ShowMeStepByStep.

Tags

What's next

Weekly Digest

Liked this card making tutorial?

Pick the categories you want to hear about. Weekly digest of new step-by-step tutorials. No spam, easy unsubscribe.

Send me tutorials about

We only email about new tutorials. Easy unsubscribe anytime.