How to Sew a Fabric Gift Bag From a Paper Bag Pattern

SewingMedium8:2710 stepsPart of Crafting for BeginnersBrowse more →
The finished result: How to Sew a Fabric Gift Bag From a Paper Bag Pattern
Also in:Crafts

By Show Me Step by StepPublished

Based on a video by SewVeryEasy.

A fabric gift bag is the kind of wrapping nobody throws away. Laura Ann Coia of SewVeryEasy shows a clever way to make one: take a paper gift bag you already have, cut it apart, and use it as your pattern. The finished bag is the same size and shape as the paper one, it stands up on its own, and it reuses the original rope handles. It is lined, so the inside looks as tidy as the outside.

How to sew a fabric gift bag: the short version

  • Pull the handles off a paper gift bag and cut it open into a flat pattern.
  • Trace it onto foam stabilizer, mark the folds and handles, and cut it out.
  • Sew the foam to your outer fabric, then cut a matching lining.
  • Baste the handles, sew the sides and box the bottom.
  • Sew the lining the same way, join the two, turn and topstitch.

Picking a paper bag to copy

Any size works. A small boutique bag makes a sweet bag for jewelry or gift cards, and a wine bag shape works for a bottle. Look for one with rope, ribbon or cord handles. Paper handles will not survive the wash. Flat sides and a crisp, square bottom give you the cleanest pattern lines.

Why foam stabilizer matters

Laura uses ByAnnie's Soft and Stable, a thin foam with fabric on both faces. It sews like fabric, it washes, and it gives the bag that upright, boxy look of a store bag while still feeling soft. Fusible fleece is a softer option, but the bag will slouch. For a stiffer bag, fuse a heavy interfacing to the outer fabric before you sew.

Fabric choices

Quilting cotton is the easy pick. It presses well and comes in endless prints. Choose a busy print for the outside and a quieter print for the lining. A fat quarter covers most small bags. Holiday prints make the bag feel like part of the gift, while a plain linen or a floral works all year.

Machine finish or hand finish?

You close the turning gap in the lining at the very end. Machine stitching is quick and sits inside the bag where nobody sees it. If you close it by hand with small hidden stitches, the bag becomes reversible, so you get two looks from one bag.

Common problems

  • The bag leans. Your side seams drifted. Sew right along the edge of the foam, not on it, and the shape squares up.
  • A handle got caught in a seam. Safety pin both handles to the middle of the bag before you sew the sides, and leave the pins in until the end.
  • Melted handles. Nylon cord melts under a hot iron. Hold steam above it and give it a tug instead.
  • Bulky corners. Trim the foam close to the stitching at every notch before you sew the box corners.

Gifting ideas

Tuck tissue paper in the top and tie on a tag. The bag is part of the present, and it usually gets used again for years. A set of three in graduated sizes makes a lovely hostess gift on its own.

More sewing projects

New to the machine? Start with how to use a sewing machine. For a softer bag try a drawstring bag or a zipper pouch. Finish the wrapping with handmade gift tags and a ribbon bow.

What you'll need

Step-by-Step Guide

10 steps · about 8 minutes.Check off each step as you go and your progress saves automatically.

1

Cut the Paper Gift Bag Open to Make a Pattern

1:52
Step 1: Cut the Paper Gift Bag Open to Make a Pattern - How to Sew a Fabric Gift Bag From a Paper Bag Pattern

Pull the rope handles out of the paper gift bag and set them aside. You will reuse them. Find the fold that runs down the center of one narrow side and cut straight down it to the bottom. Then cut along the bottom edge to the corner on both sides. Open it out flat. That flat piece of paper is now your pattern.

Tip

Keep the paper bag in one piece. Cutting it into separate panels makes the pattern harder to trace.

2

Trace the Paper Bag Pattern Onto Soft and Stable

2:15
Step 2: Trace the Paper Bag Pattern Onto Soft and Stable - How to Sew a Fabric Gift Bag From a Paper Bag Pattern

Lay the flat paper bag on a sheet of Soft and Stable and trace all the way around the outside with a marker. Before you lift it, mark where the handles were, where each fold line runs, and the seam along the bottom. Those marks tell you where to sew the sides and where the handles go later. You have made your own pattern.

Tip

Press the paper flat with one hand while you trace so the bag does not shift.

3

Cut Out the Soft and Stable Gift Bag Pattern

2:40
Step 3: Cut Out the Soft and Stable Gift Bag Pattern - How to Sew a Fabric Gift Bag From a Paper Bag Pattern

Line up a clear quilting ruler on your traced lines and cut along them with a rotary cutter. Work your way around the whole shape on both sides. Leave the small notches at the bottom corners for now. You will trim those after the foam is sewn to the fabric, when it is easier to cut them cleanly.

Tip

A fresh rotary blade cuts foam in one pass. A dull one drags and tears it.

4

Pin and Sew the Foam Pattern to the Outer Fabric

3:20
Step 4: Pin and Sew the Foam Pattern to the Outer Fabric - How to Sew a Fabric Gift Bag From a Paper Bag Pattern

Press your outer fabric so it lies flat. Set the foam pattern on top, leaving at least an inch of fabric showing all the way around, and pin it in place. Sew along the fold lines and the bottom seam line with matching thread. You can run straight off the edge of the fabric. Soft and Stable feeds through the machine with no trouble.

Tip

Use a slightly longer stitch length so the foam does not pucker.

5

Trim the Foam From the Gift Bag Corners

3:29
Step 5: Trim the Foam From the Gift Bag Corners - How to Sew a Fabric Gift Bag From a Paper Bag Pattern

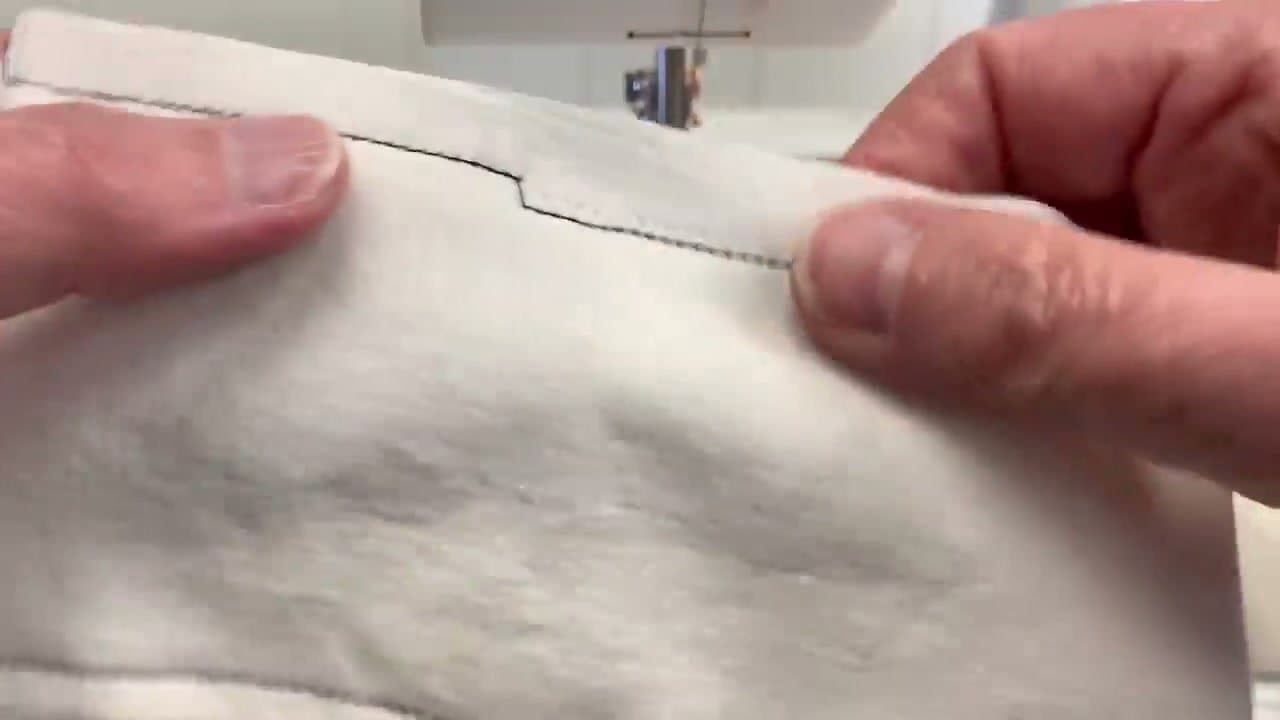
Slide the tip of your scissors between the foam and the fabric at each bottom corner notch. Cut out the foam only, trimming as close to your stitching as you can without nicking the fabric. Then sew a second row of stitching a quarter inch in from the edge of the foam, all the way around. Give the piece a good press.

Tip

Small, sharp scissors are easier to control than big shears in the notches.

6

Layer the Outer Bag Piece on the Lining Fabric

4:08
Step 6: Layer the Outer Bag Piece on the Lining Fabric - How to Sew a Fabric Gift Bag From a Paper Bag Pattern

Lay your pressed lining fabric right side up. Place the outer bag piece on top, right side down. Cut both layers together, leaving a half inch seam allowance all the way around the foam. Cutting them as a stack means the lining comes out exactly the same size and shape as the outside, notches and all.

Tip

Pick a lining print that peeks out nicely at the top of the bag.

7

Pin the Rope Handles to the Front of the Gift Bag

4:30
Step 7: Pin the Rope Handles to the Front of the Gift Bag - How to Sew a Fabric Gift Bag From a Paper Bag Pattern

Mark the handle spots on the front with a pin, then turn the piece over. Pin each handle end at its mark with the loop facing down into the bag. Sew the ends in place inside the seam allowance. Then safety pin both handles to the middle of the bag so they cannot get caught in a side seam. Leave those pins in for now.

Tip

Measure so both handles sit the same distance from the side folds.

8

Sew the Side Seams and Box the Bottom of the Gift Bag

5:32
Step 8: Sew the Side Seams and Box the Bottom of the Gift Bag - How to Sew a Fabric Gift Bag From a Paper Bag Pattern

Fold the bag in half and sew right beside the edge of the foam, not on top of it. Press the seams open. Push the bottom into its box shape and the corners line up on their own. Sew along the foam edge across each corner, keeping the seams flat. Turn the bag right side out and it already wants to stand up.

Tip

Do not worry if a seam wanders onto the foam a little. It will not show.

9

Sew the Lining and Join It to the Fabric Gift Bag

6:35
Step 9: Sew the Lining and Join It to the Fabric Gift Bag - How to Sew a Fabric Gift Bag From a Paper Bag Pattern

Fold the lining in half and sew it with a half inch seam. On the second side, sew only a little at the top and a little at the bottom. That gap is how you will turn the bag. Box the lining corners the same way and press the seams. Slip the outer bag and lining together, right sides facing, and sew around the top beside the foam.

Tip

Match the side seams first, then pin the top edges all the way around.

10

Turn, Topstitch and Press the Finished Gift Bag

7:20
Step 10: Turn, Topstitch and Press the Finished Gift Bag - How to Sew a Fabric Gift Bag From a Paper Bag Pattern

Pull the bag right side out through the gap in the lining. Close the gap by machine, or by hand if you want the bag to be reversible. Tuck the lining in, remove the safety pins and push out the corners. Topstitch around the top along your earlier quarter inch line. Press the side folds and hit the handles with steam only.

Tip

Keep the iron off nylon handles. Steam them and give a gentle pull.

How to Sew a Ladder Stitch (Invisible Hand Stitch)

Keep going

How to Sew a Ladder Stitch (Invisible Hand Stitch)

Products Used

The Checklist

How to Sew a Fabric Gift Bag From a Paper Bag Pattern

Tools
8
Materials
5
Steps
10
Video
8 min

Tools we recommend

Your Guide

SewVeryEasy

As an Amazon Associate we earn from qualifying purchases. Links on this page may be affiliate links - clicking them and buying doesn't change your price, but helps support Show Me Step by Step.

Tags

Sunday How-To

New sewing tutorials, every Sunday

One short email with the week's best step-by-step guides. Free, no spam, unsubscribe anytime.

Did this work for you?

What's next

Weekly Digest

Liked this sewing tutorial?

Pick the categories you want to hear about. Weekly digest of new step-by-step tutorials. No spam, easy unsubscribe.

Send me tutorials about

We only email about new tutorials. Easy unsubscribe anytime.