How to Make Tissue Paper Flowers (Easy 5-Minute Craft)

Also in:Other Crafts

By ShowMeStepByStepPublished

Based on a video by VIKI Studio Origami.

Tissue paper flowers are the best return on five minutes of effort in the craft world. A stack of cheap tissue, a twist of wire, and a few snips with scissors gets you a fluffy bloom that looks like a peony or a carnation. They cost pennies. They take five minutes. And once you know the basic accordion-fold, you can crank out a dozen in an afternoon for any party or photo backdrop.

Viki from VIKI Studio Origami uses pink napkins in this video, but the technique is identical with tissue paper - and tissue paper gives lighter, fluffier petals. Stack 4-8 sheets, accordion-fold the stack, tie the middle with floral wire, round the ends into petal shapes, and fluff each layer toward the center one at a time. The whole thing fits on a kitchen table.

For more easy paper crafts, see our guides on making paper roses, folding an origami crane, and cutting a paper snowflake.

Step-by-Step Guide

1

Step 1: Stack 4-8 Sheets of Tissue Paper

0:05
Step 1: Step 1: Stack 4-8 Sheets of Tissue Paper

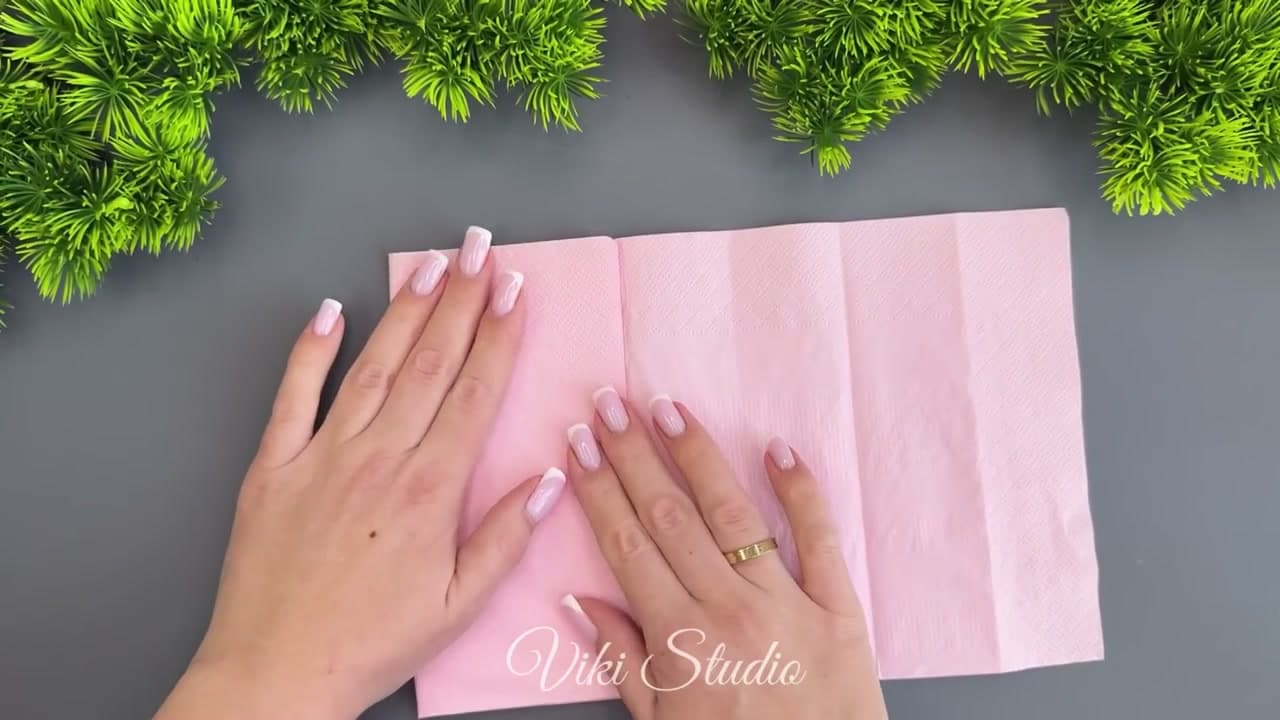
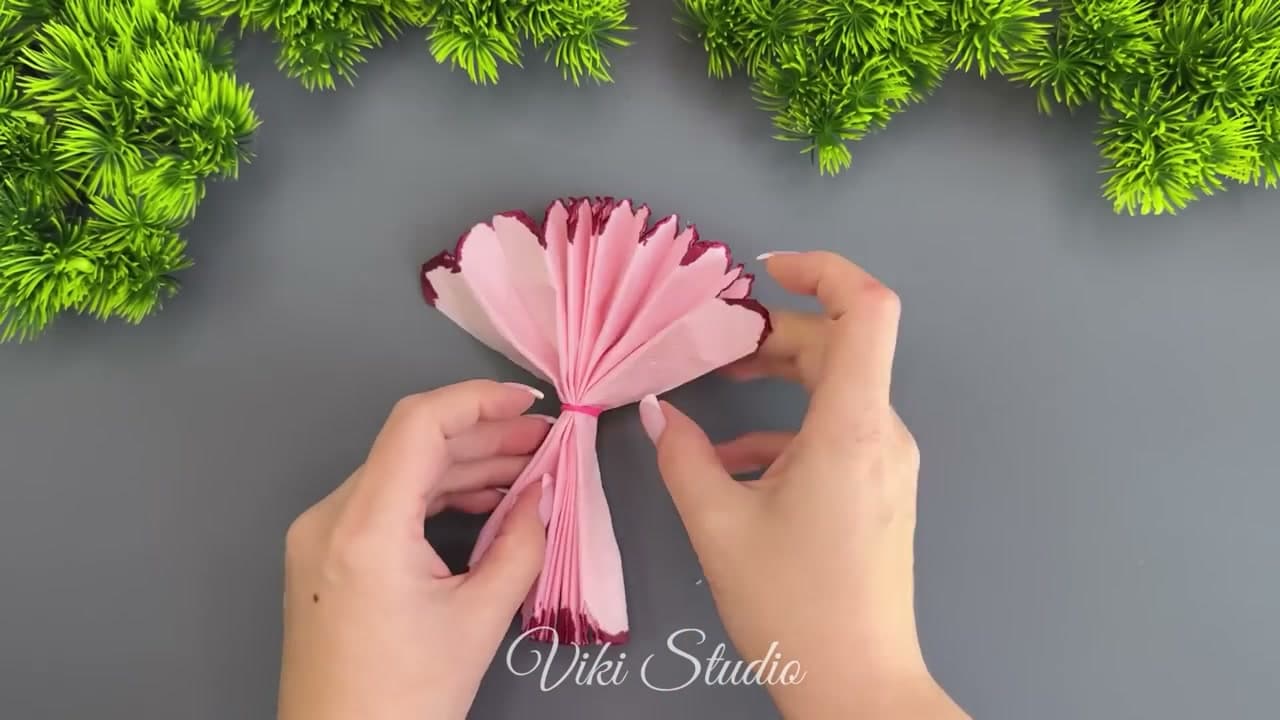
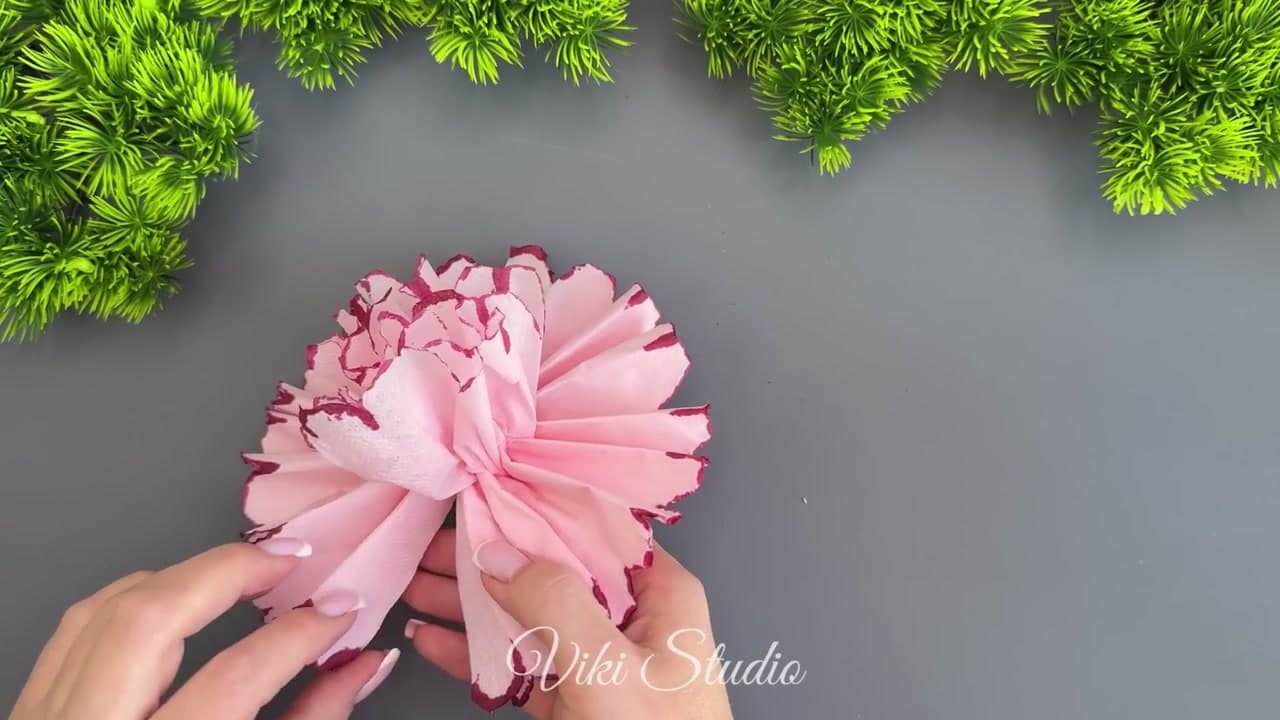
Pick out 4-8 sheets of tissue paper in the color you want. Four sheets gives you a smaller, daintier flower. Eight sheets gives you a thick, fluffy peony-style bloom. For most party decor, six is the sweet spot.

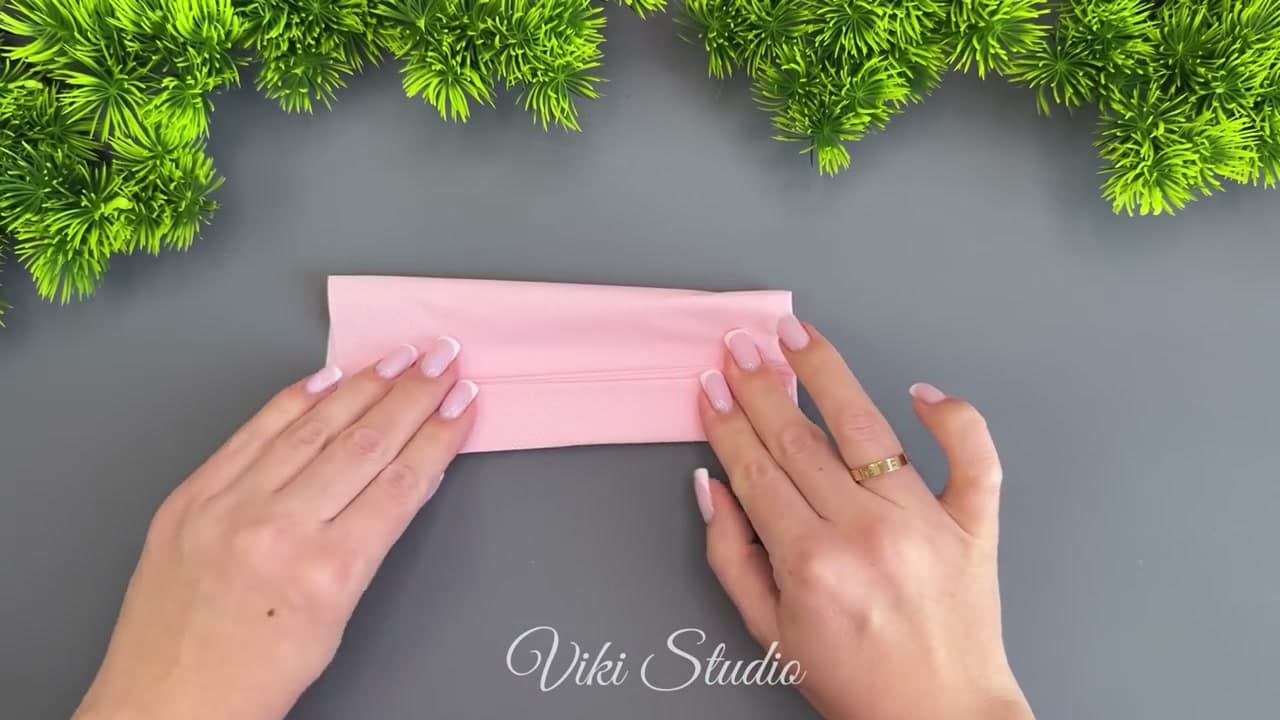
Lay the sheets flat on top of each other, lining up the edges as best you can. The sheets don't have to be perfectly square - small misalignments disappear once the flower is fluffed. If you want a multi-color flower, alternate two colors in the stack (for example, three pink sheets, three white) and you'll get a layered ombre effect when the petals separate.

Standard tissue paper sheets are around 20 x 30 inches. That gives a finished flower roughly 8-10 inches across. For smaller flowers, cut the stack in half before folding.

Tip

Cheap tissue paper from the dollar store works great - the thinner the sheets, the easier they are to fluff and separate at the end. Skip the heavy gift-grade tissue for this project.

2

Step 2: Accordion-Fold the Stack

1:00
Step 2: Step 2: Accordion-Fold the Stack

This is the only fold that matters. Fold the stack over on itself in roughly 1-inch wide pleats, like an accordion or a paper fan. Crease each fold sharply with your fingernail before turning the stack over to make the next pleat in the opposite direction.

Keep folding until the entire stack is pleated into a long narrow strip. The width of each pleat is what determines petal thickness - 1 inch is a good default. Narrower pleats (1/2 inch) give a more delicate flower with more visible layers. Wider pleats (1.5 inches) give a bolder, simpler look.

Don't overthink the pleat width. As long as they're roughly even and the creases are sharp, the flower will look great.

Tip

If the sheets shift while you're folding, that's fine. Press the whole stack flat against the table with one hand while you fold with the other. The center tie in the next step locks everything in place.

3

Step 3: Tie the Center With Floral Wire

1:30
Step 3: Step 3: Tie the Center With Floral Wire

Find the middle of the folded strip and wrap a piece of floral wire or a pipe cleaner around it. Twist the wire tight enough that the pleats can't slide, but not so tight that you tear the tissue. Two firm twists is usually plenty.

The wire becomes the stem, so leave a few inches hanging off if you want a flower you can put in a vase or wire to a backdrop. For decoration that just sits on a table, a short twist tie works fine.

Pipe cleaners (chenille stems) in matching colors are the easiest option for kids' projects - they grip the tissue without tools and the fuzzy texture hides any uneven folds at the center.

Tip

If you're making a wall of flowers, leave 6-8 inches of wire on each one. You can twist multiple stems together to make bouquets, or use the wire to attach flowers directly to a mesh backdrop or a wooden hoop.

4

Step 4: Round the Ends Into Petal Shapes

1:45
Step 4: Step 4: Round the Ends Into Petal Shapes

With the folded stack still flat, take a sharp pair of scissors and round off both ends. The shape you cut becomes the petal shape, so think about what you want: a soft curve for round, peony-style petals, a pointed cut for spiky chrysanthemum petals, or a scalloped cut for ruffled carnations.

Cut through all the layers at once - good scissors make this easy, dull scissors make it a fight. If your scissors struggle, separate the stack into two halves and cut them one at a time, then reassemble before fluffing.

Don't worry about the cuts being identical on both ends. Once the flower is fluffed, small variations look natural and organic - too-perfect petals look fake.

Tip

Cut a little deeper than you think you need to. The petals look much smaller once they're separated and fluffed - what looks like a generous curve flat on the table becomes a subtle one in a finished bloom.

5

Step 5: Tint the Petal Edges (Optional)

2:15
Step 5: Step 5: Tint the Petal Edges (Optional)

This is the trick that takes the flower from cute to gorgeous. Take a watercolor brush marker in a darker shade than your tissue (burgundy for pink, deep gold for yellow, navy for blue) and run the tip lightly along the cut edges of the folded stack.

The ink bleeds into the tissue and gives the petals a tinted edge that mimics a real garden flower. Press lightly - too much ink soaks through and stains the whole petal. A quick swipe is enough.

Skip this step for a solid-color flower and the bloom still looks great. But the tinted edges are what makes tissue paper flowers look like real carnations or peonies instead of obvious paper crafts.

Tip

Tombow Dual Brush Pens or Crayola Super Tips both work well. Avoid permanent markers - they don't blend into the tissue and they smell strong. Water-based brush markers are the right tool.

6

Step 6: Fan the Folds Open

2:45
Step 6: Step 6: Fan the Folds Open

Hold the wire-tied center between your fingers and gently spread the two halves of the folded strip apart. The accordion pleats fan out into a half-circle on each side of the tie, like a bow tie made of tissue.

Push the pleats out as wide as they'll go without tearing. The flatter and rounder you can get this bow-tie shape, the more even the finished flower will look. If the petals on one side are bunched, work them open with your fingertips before moving to the next step.

You should now see the layered edges from the side - that's what gives the finished flower its dimension.

Tip

If the wire feels loose after fanning, give it one more twist. The petals pull on the center as they open, and a loose tie can come undone halfway through fluffing.

7

Step 7: Separate and Fluff Each Layer Toward the Center

3:20
Step 7: Step 7: Separate and Fluff Each Layer Toward the Center

This is where the flower comes to life. Start with the top layer of tissue and gently pull it up toward the center of the flower. Work around the whole circle, lifting and crumpling each petal individually until that layer stands up.

Repeat with the next layer down, then the next, working from the outside in. Pull each layer slightly less than the one above it so you build up a dome of fluffed petals that gets denser as it reaches the center.

Take your time on this step. Rushing it gives you a flat, messy flower. Two or three minutes of patient fluffing is what turns a stack of cut tissue into a bloom that looks like a real flower.

Tip

If a layer tears while you're separating it, don't panic - the tear disappears once the petals are fluffed. Just keep going. Tissue paper is forgiving and the final result hides almost every imperfection.

8

Step 8: Shape the Finished Flower

4:30
Step 8: Step 8: Shape the Finished Flower

Once every layer is fluffed, use both hands to round the whole bloom into a sphere. Press lightly from the sides to push stray petals into place, then puff the center up so it sits higher than the outer petals.

If the flower looks flat or one-sided, gently lift more petals on the low side until the shape is symmetrical. For a peony look, push all the petals tight together. For a carnation look, leave a little space between them so the tinted edges are visible.

That's the whole flower. Cluster a few together for a centerpiece, tape them to a wall for a party backdrop, wire them to a wreath form, or hand one to someone as is. For more colors, repeat with different tissue - yellow gives you marigolds, white gives you peonies, red gives you carnations.

Tip

Tissue paper flowers store flat. If you're making a bunch for a party, stack the finished blooms in a box with a sheet of tissue between each one. They re-fluff in seconds when you take them out.

Products Used

☐ The Checklist

How to Make Tissue Paper Flowers (Easy 5-Minute Craft)

Tools
2
Materials
3
Steps
8
Video
5 min

Your Guide

VIKI Studio Origami

As an Amazon Associate we earn from qualifying purchases. Links on this page may be affiliate links - clicking them and buying doesn't change your price, but helps support ShowMeStepByStep.

Tags

What's next

Weekly Digest

Liked this paper crafts tutorial?

Pick the categories you want to hear about. Weekly digest of new step-by-step tutorials. No spam, easy unsubscribe.

Send me tutorials about

We only email about new tutorials. Easy unsubscribe anytime.