How to Cook a Chicken Breast

CookingEasy11:247 steps

Based on a video by Epicurious.

Dry, stringy chicken is a tragedy that happens every day in home kitchens. The breast goes in, cooks too long, and comes out tasting like an eraser. It does not have to be this way.

This walkthrough is based on a tutorial from Chef Frank Proto at Epicurious 101. Seven steps, stainless steel pan, a little oil, and you'll be surprised how juicy a plain chicken breast can taste.

Step-by-Step Guide

1

Pick and Prep the Breasts

0:45
Step 1: Pick and Prep the Breasts

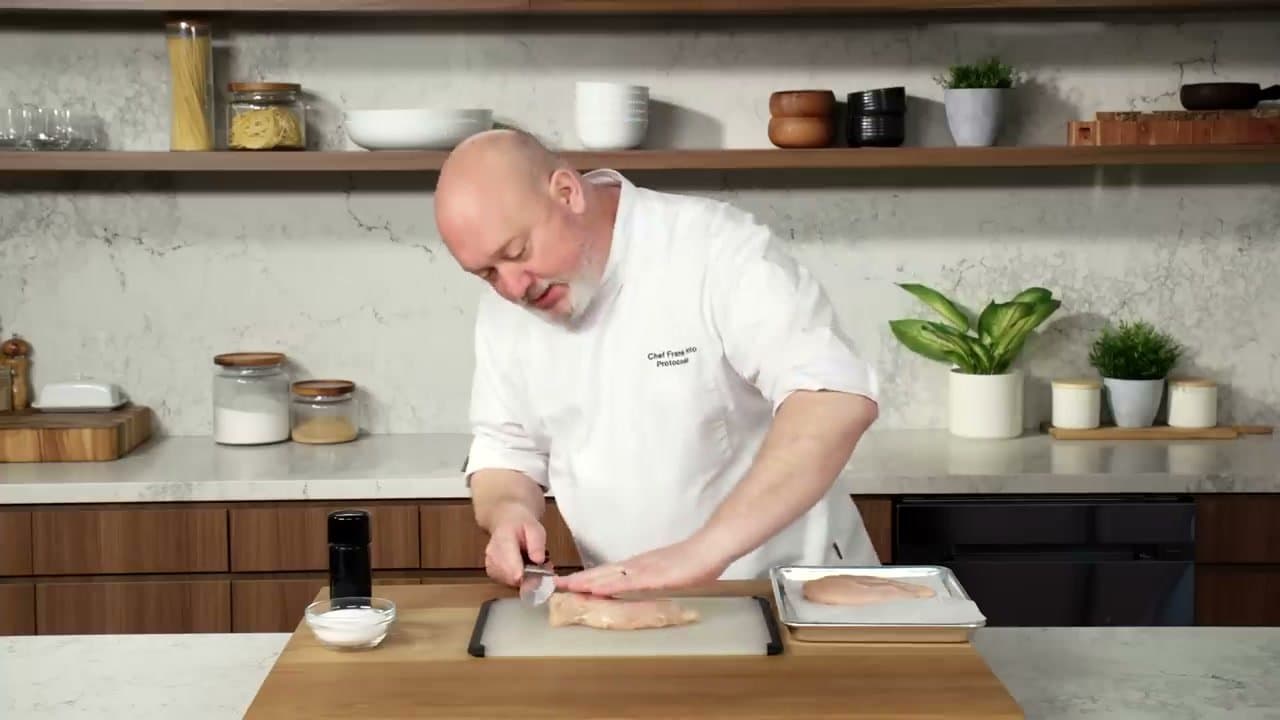
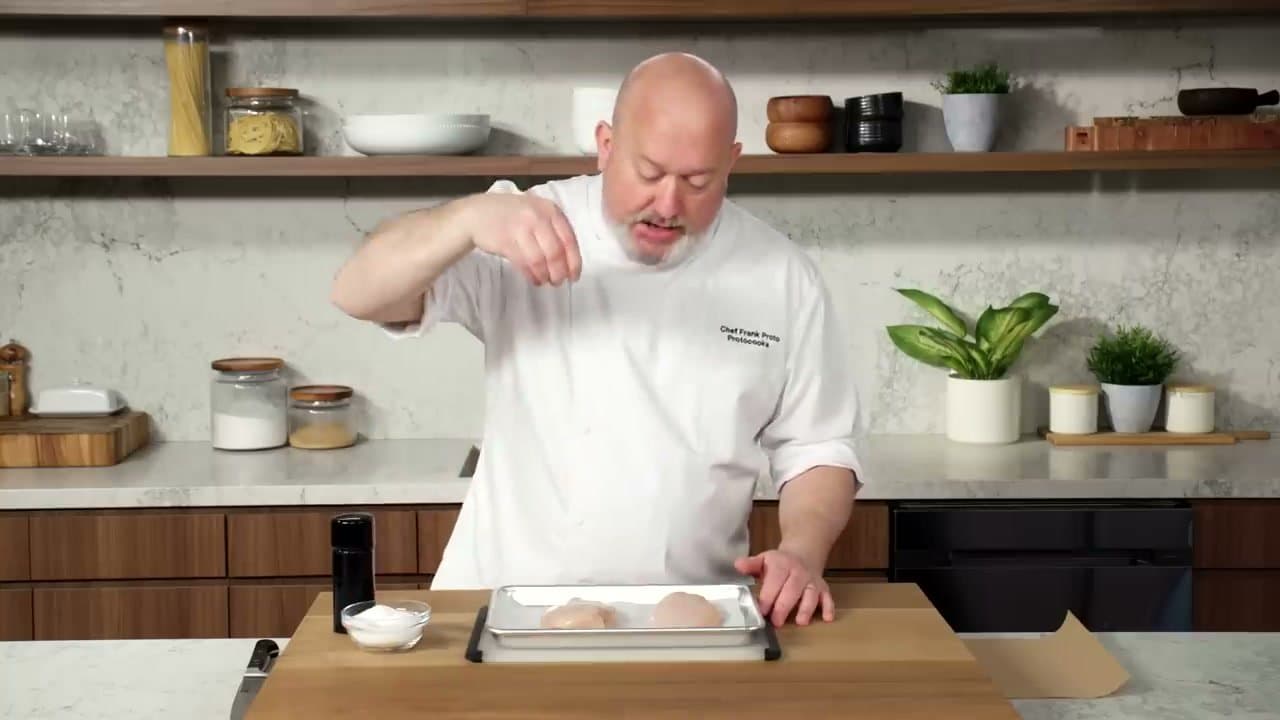
Pick smaller chicken breasts when you can - they're more tender and cook more evenly. If you only have a thick one, butterfly it: put your flat hand on top, press down lightly with fingers pointed up, and slice horizontally down the center to make two thinner pieces.

Butterflying beats pounding. A pounded breast overcooks in the time it takes to brown it. Two thinner halves brown and cook at the same time.

Tip

If you're buying boneless skinless breasts specifically for a sauté, look for ones under 8 ounces. Anything bigger should probably be roasted instead.

2

Pat Dry and Season High

1:50
Step 2: Pat Dry and Season High

Pat each breast completely dry with paper towels before seasoning. Any surface moisture will steam in the pan instead of browning.

Season with kosher salt and freshly cracked black pepper on both sides. Season from up high - about 12 inches above the chicken - so the salt falls evenly instead of landing in clumps. Skip the spice rubs; they burn in a hot sauté pan.

Tip

Kosher salt specifically. Table salt is too fine - you end up over-salting because each grain is so small.

3

Heat a Stainless Pan With Oil

3:00
Step 3: Heat a Stainless Pan With Oil

Heat a heavy-bottomed stainless steel skillet over high heat with a neutral oil - vegetable, canola, or avocado. Cast iron works but a stainless pan gives cleaner fond for a pan sauce later if you want one.

Wait until the oil shimmers and looks like waves moving across the surface. A light wisp of smoke means you're ready. Oil that looks still and flat is not hot enough yet.

Tip

Skip olive oil here. Its smoke point is too low and the flavor burns off anyway once you're this hot.

4

Drop the Chicken Away From You

2:50
Step 4: Drop the Chicken Away From You

Pat the chicken one more time (salt will have drawn out moisture while the pan heated), then drop each breast into the pan laying it down away from you. Dropping away, not toward, means any oil splash goes at the back of the stove instead of you.

Now leave it alone. No poking, no moving, no checking. Let the pan do its job.

Tip

If the pan is truly hot, the chicken will release itself when it's ready to flip. If it sticks, it needs more time - don't force it.

5

Flip When Golden Brown

4:45
Step 5: Flip When Golden Brown

After 3 to 4 minutes, lift one edge to check the color. Once the underside is a deep, even golden brown, flip once and cook the second side.

Adjust heat if you need to. You want steady browning and a bit of sizzle, not smoke billowing off the pan. Cast iron sometimes has hot spots - rotate the chicken if one side is browning faster.

Tip

Tongs are better than a spatula here. Spatulas lift too much of the crust off the pan.

6

Check Doneness by Feel

6:20
Step 6: Check Doneness by Feel

A raw breast is soft and spongy when you poke it. As it cooks, it firms up and starts to bounce back. Bouncy (not squishy) means done - usually 3 to 4 minutes per side for butterflied pieces.

If you want to be sure, use an instant-read thermometer. 165 degrees internal is the USDA safe temperature; some chefs pull at 160 and let carryover finish the job.

Tip

The poke test gets intuitive fast. Once you've done it on a few breasts, you'll know the texture without thinking.

Products used in this step

7

Rest Before Slicing

7:30
Step 7: Rest Before Slicing

Move the chicken to a plate and let it rest for 5 minutes before slicing. Cutting immediately lets the juices run out onto the cutting board. Rest it and those juices stay in the meat.

Five minutes feels long. It isn't. While the chicken rests, you can deglaze the pan for a sauce or toss a salad.

Tip

Tent loosely with foil if you're worried about heat loss. Wrapping too tight traps steam and softens the crust you just worked for.

Products Used

Your Guide

Epicurious

As an Amazon Associate we earn from qualifying purchases. Links on this page may be affiliate links - clicking them and buying doesn't change your price, but helps support ShowMeStepByStep.

Tags

Related Tutorials