How to Write a Check (Step-by-Step Guide)

AdultingEasy4:187 steps
Also in:Lifestyle

Based on a video by TruFinancials.

Even if you pay for most things with Venmo or a card, you'll eventually run into something that needs a paper check. A landlord, a small contractor, a wedding gift, a DMV fee. Write it wrong and the bank rejects it or, worse, someone alters it before it's cashed.

This 7-step walkthrough is based on a short tutorial by Denis at TruFinancials. Four minutes, one check, and you'll know exactly what goes on each line and why.

Step-by-Step Guide

1

Know the Parts of a Check

0:45
Step 1: Know the Parts of a Check

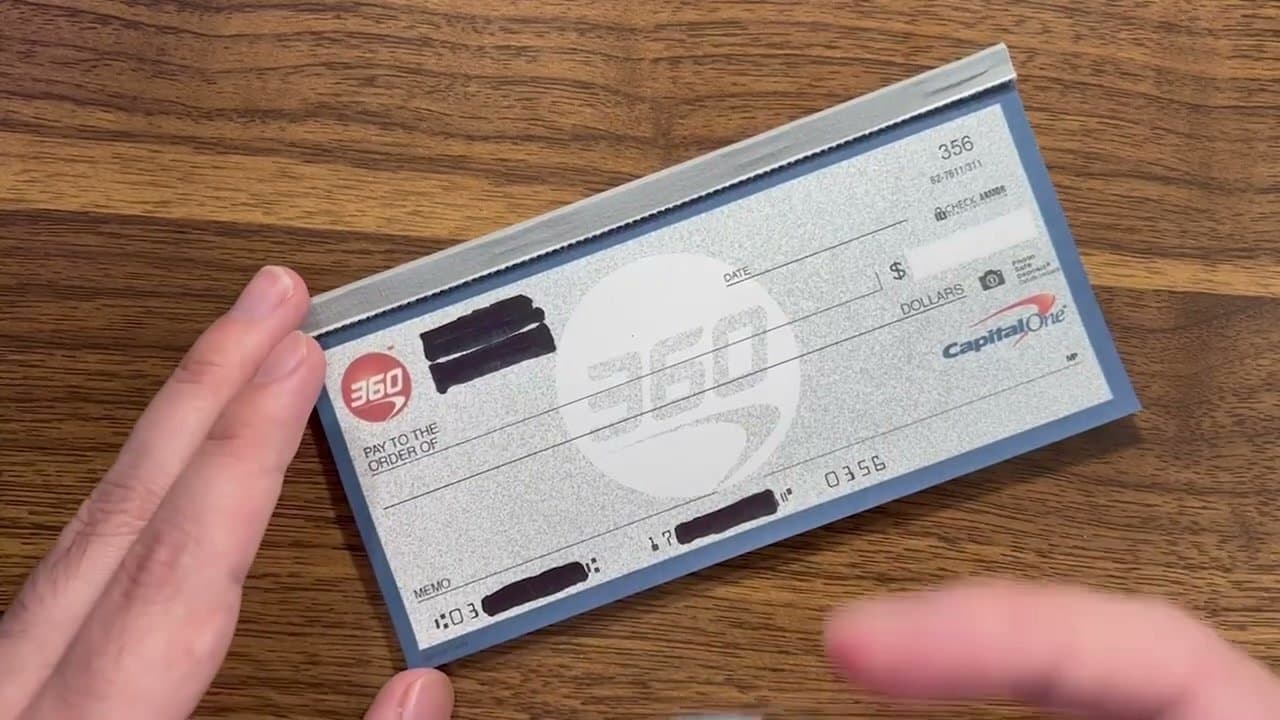
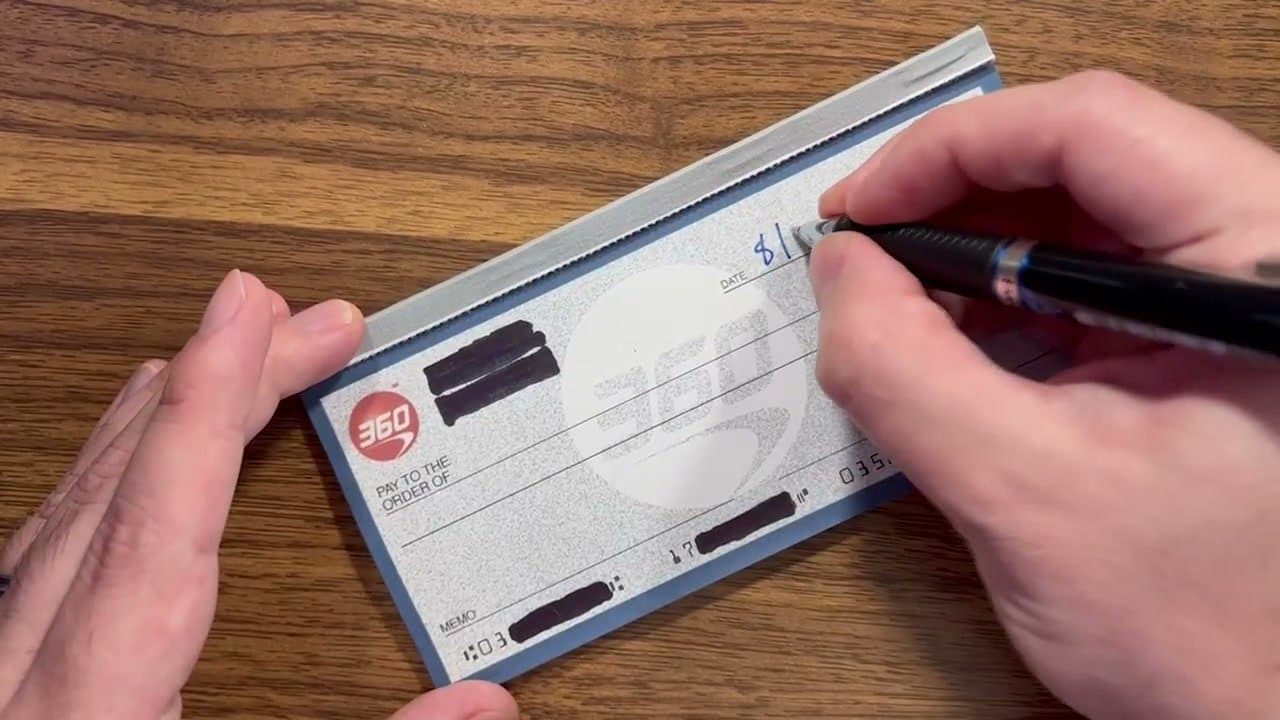
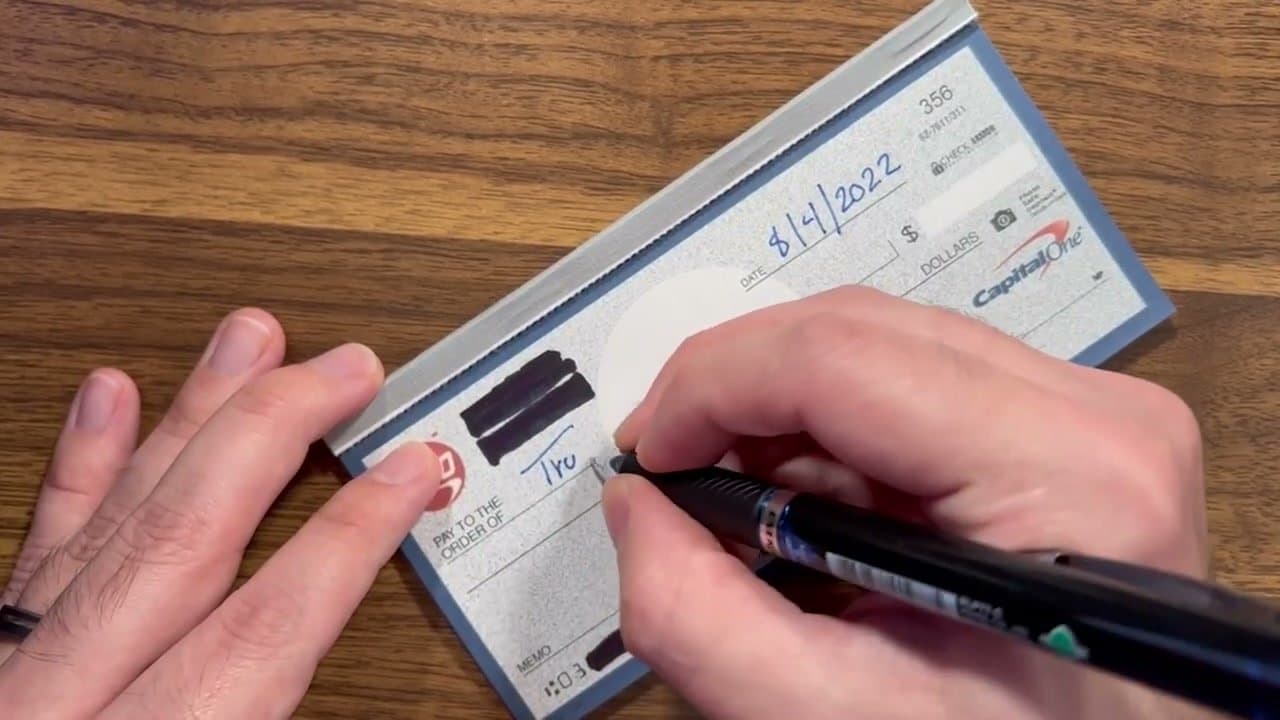
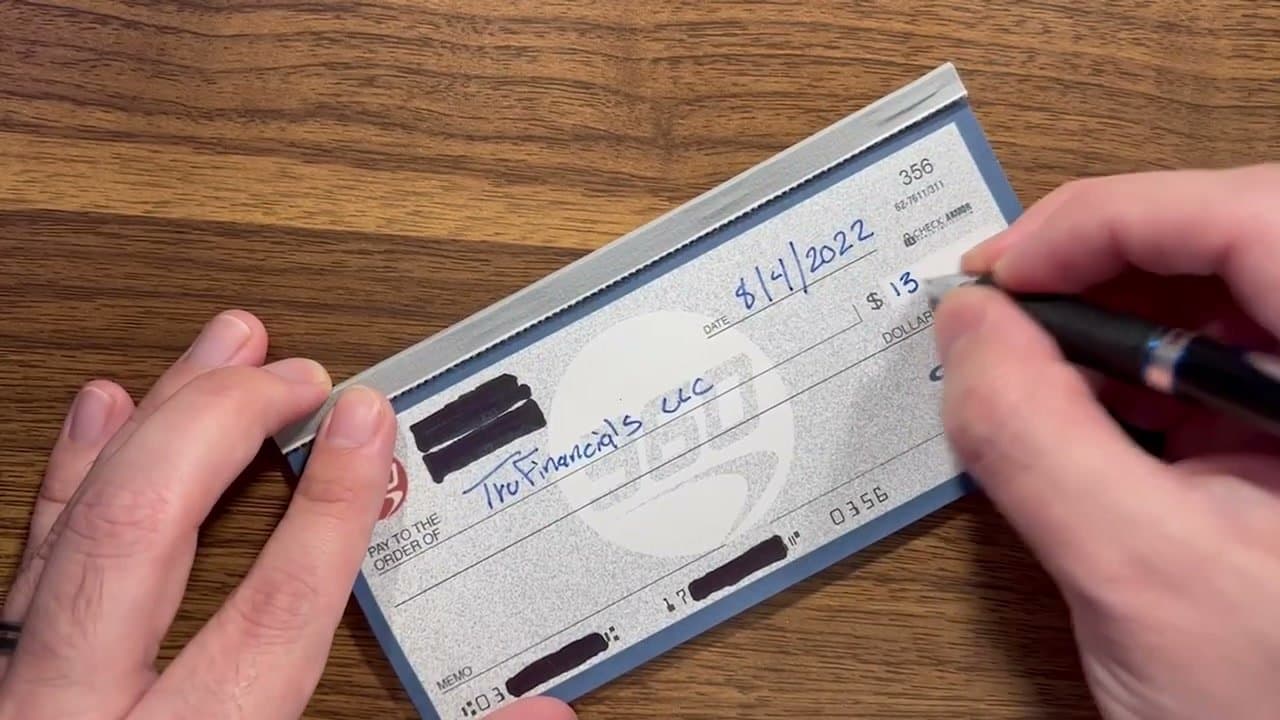
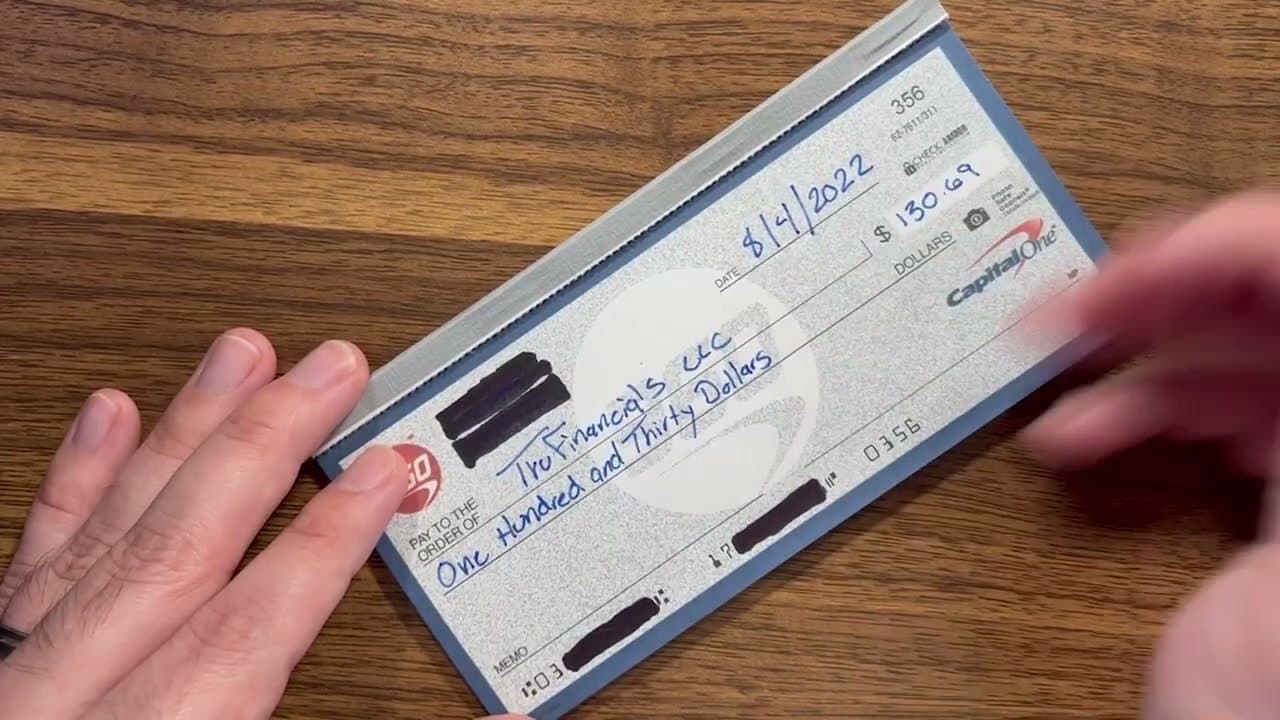
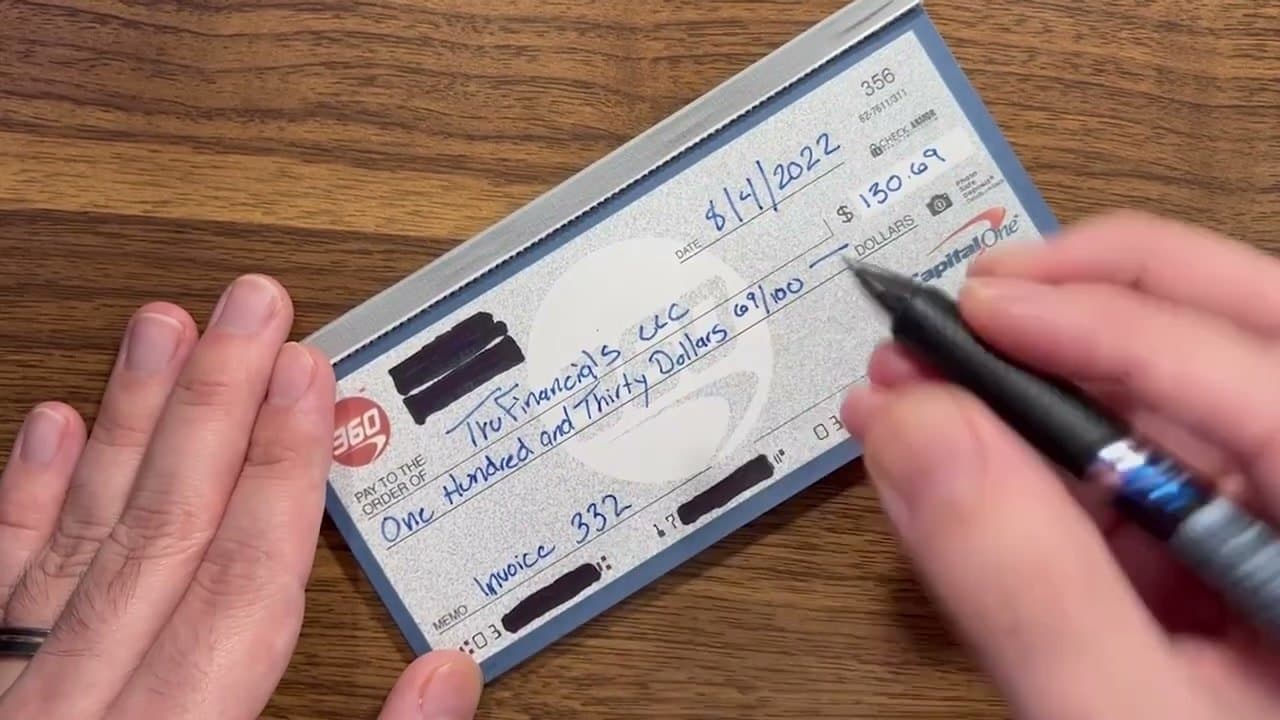
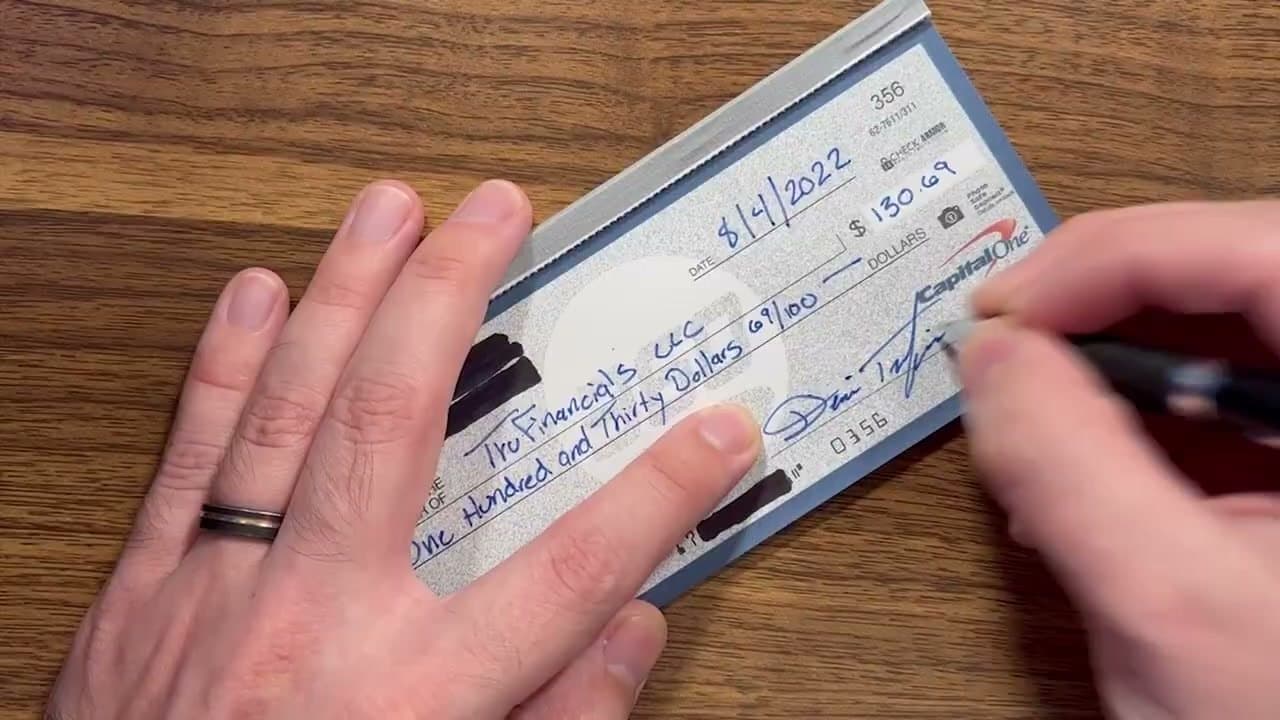
Before you write anything, look at the blank check. Your name and address sit in the top-left. The date line runs along the top-right, with the amount box just below it. 'Pay to the order of' is the long line down the middle. The dollar-amount line is below that, and the memo and signature lines sit at the bottom.

Along the bottom edge you'll see two long numbers. The one on the left is your bank's routing number. The one on the right is your account number. The shorter number above the line (and again in the top-right corner) is the check number, which keeps your records in order.

Tip

If you're ever paying someone and don't have your phone handy, the routing and account numbers at the bottom of the check are the same ones you'd find in your banking app.

2

Write the Date

1:22
Step 2: Write the Date

Write today's date on the date line. Use the full four-digit year (2026, not '26). Abbreviating the year makes it easier for someone to change it later, so banks and accountants prefer the long form.

Want the check cashed later? Post-date it by writing a future date. Your recipient can hold it until then, though a post-date isn't a guarantee the bank will wait.

Tip

Avoid back-dating checks unless you genuinely lost track of time. Writing yesterday's date on a check you hand over today can create issues if the account balance shifts.

3

Fill In the Payee

2:05
Step 3: Fill In the Payee

On the 'Pay to the order of' line, write exactly who the money is going to. For a company, use the legal business name - ask if you're not sure. For an individual, use their first and last legal name, not a nickname or middle name.

Why the fuss? When your recipient tries to deposit the check, their bank matches the name on the check to the name on their ID. 'Mike' and 'Michael' can trip it up. Getting this right saves them a trip to the bank.

Tip

For rent or invoices, double-check the name on a past email or statement. Small businesses often operate under a name that's different from the one on their bank account.

4

Write the Amount in Numbers

2:23
Step 4: Write the Amount in Numbers

In the small box with the dollar sign, write the amount as a number with dollars and cents. For one hundred thirty dollars and sixty-nine cents, you'd write 130.69.

Start right up against the dollar sign. Any space you leave is room for someone to slip in a digit and turn 130.69 into 1,130.69.

Tip

If the amount is a round number, still write the cents. '50.00' is safer than just '50'.

5

Spell the Amount in Words

3:00
Step 5: Spell the Amount in Words

On the long line below the payee, write the dollars out in words and put the cents as a fraction over 100. One hundred thirty dollars and sixty-nine cents becomes One hundred and thirty dollars and 69/100. Banks treat the written amount as the official figure if the number and words ever disagree.

After the fraction, draw a straight line through any empty space on the line. That blocks anyone from tacking on extra words.

Tip

Writing a larger amount? Plan your spacing before you start so you don't run out of room halfway through.

6

Add a Memo

3:38
Step 6: Add a Memo

The memo line in the bottom-left is optional, but worth using. Write what the check is for: 'Invoice 332', 'April rent', 'birthday gift'. If you ever need to look back at your records, you'll thank yourself.

Some businesses ask you to put an account number in the memo so they can credit the payment correctly. If they ask, that's where it goes.

Tip

Never write sensitive info like a full Social Security number in the memo. The check passes through a lot of hands.

7

Sign the Check

4:00
Step 7: Sign the Check

Sign your name on the signature line in the bottom-right, exactly as it appears on your bank's records. An unsigned check isn't valid, so this is the step that turns a piece of paper into money.

Hand it over, and you're done. If you made a mistake anywhere along the way, don't just cross it out - void the check by writing 'VOID' in large letters across the front, and start again on a fresh one.

Tip

Keep your signature consistent across checks. A signature that looks nothing like the one your bank has on file can get a check flagged.

Your Guide

TruFinancials

As an Amazon Associate we earn from qualifying purchases. Links on this page may be affiliate links - clicking them and buying doesn't change your price, but helps support ShowMeStepByStep.

Tags

Related Tutorials